AWS Hints and Tips
Creating an AWS account
https://aws.amazon.com/premiumsupport/knowledge-center/create-and-activate-aws-account/
Create the Root User
Step 1: Set Up an AWS Account and Create an Administrator User
https://docs.aws.amazon.com/lexv2/latest/dg/gs-account.html
Creating your first IAM admin user and user group
https://docs.aws.amazon.com/IAM/latest/UserGuide/getting-started_create-admin-group.html
What is Amazon Lex V2?
https://docs.aws.amazon.com/lexv2/latest/dg/what-is.html
Building Bots
https://docs.aws.amazon.com/lexv2/latest/dg/building-bots.html
You tube quick guide https://www.youtube.com/watch?v=Gy0C9g16DW0
Step by Step Screen Shots
Step by Step Creating a Lex Bot
Create a bot
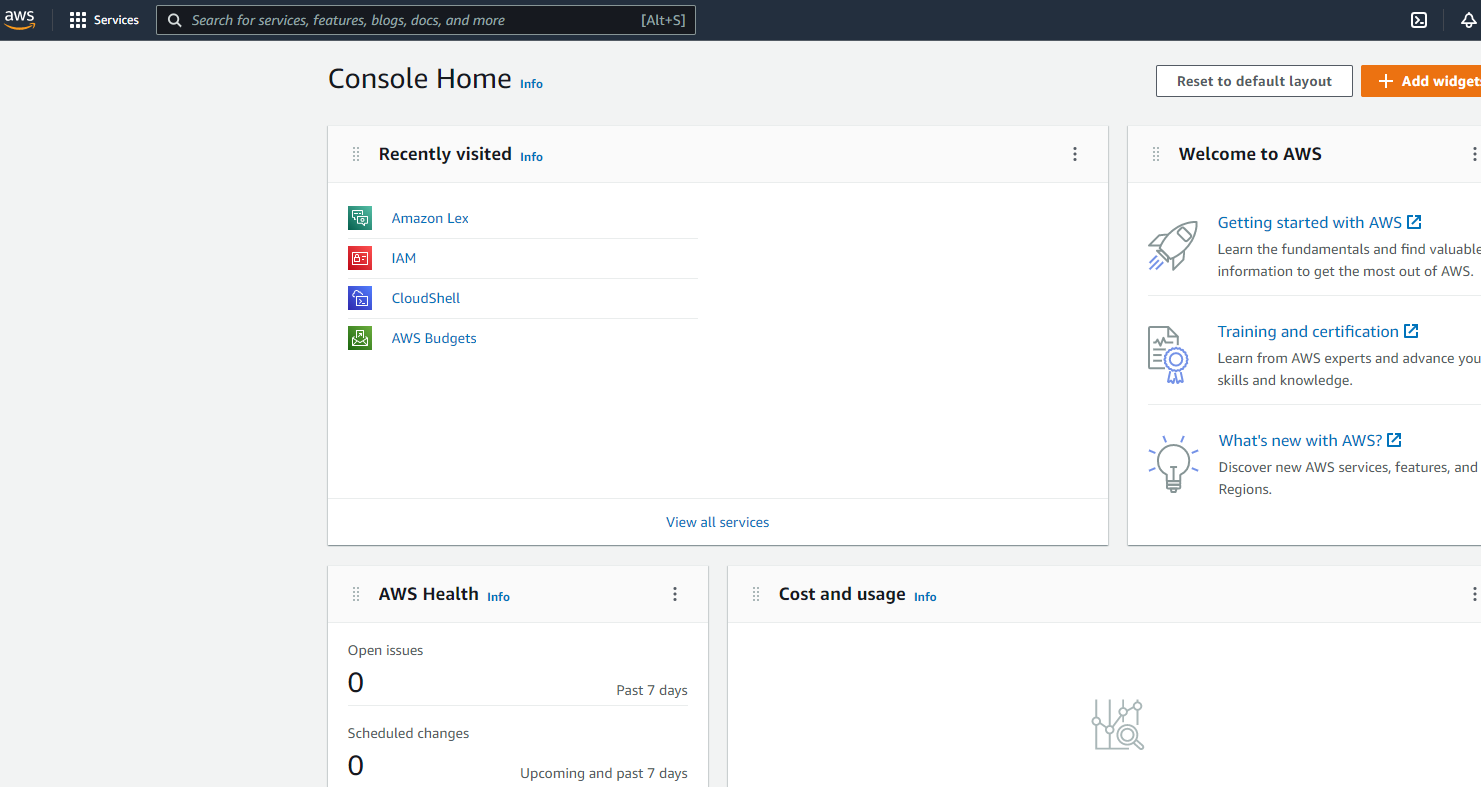
1. From the AWS console home screen enter Lex in the search function if you have not already created a bot.
2. If you have created a bot then click on Amazon Lex
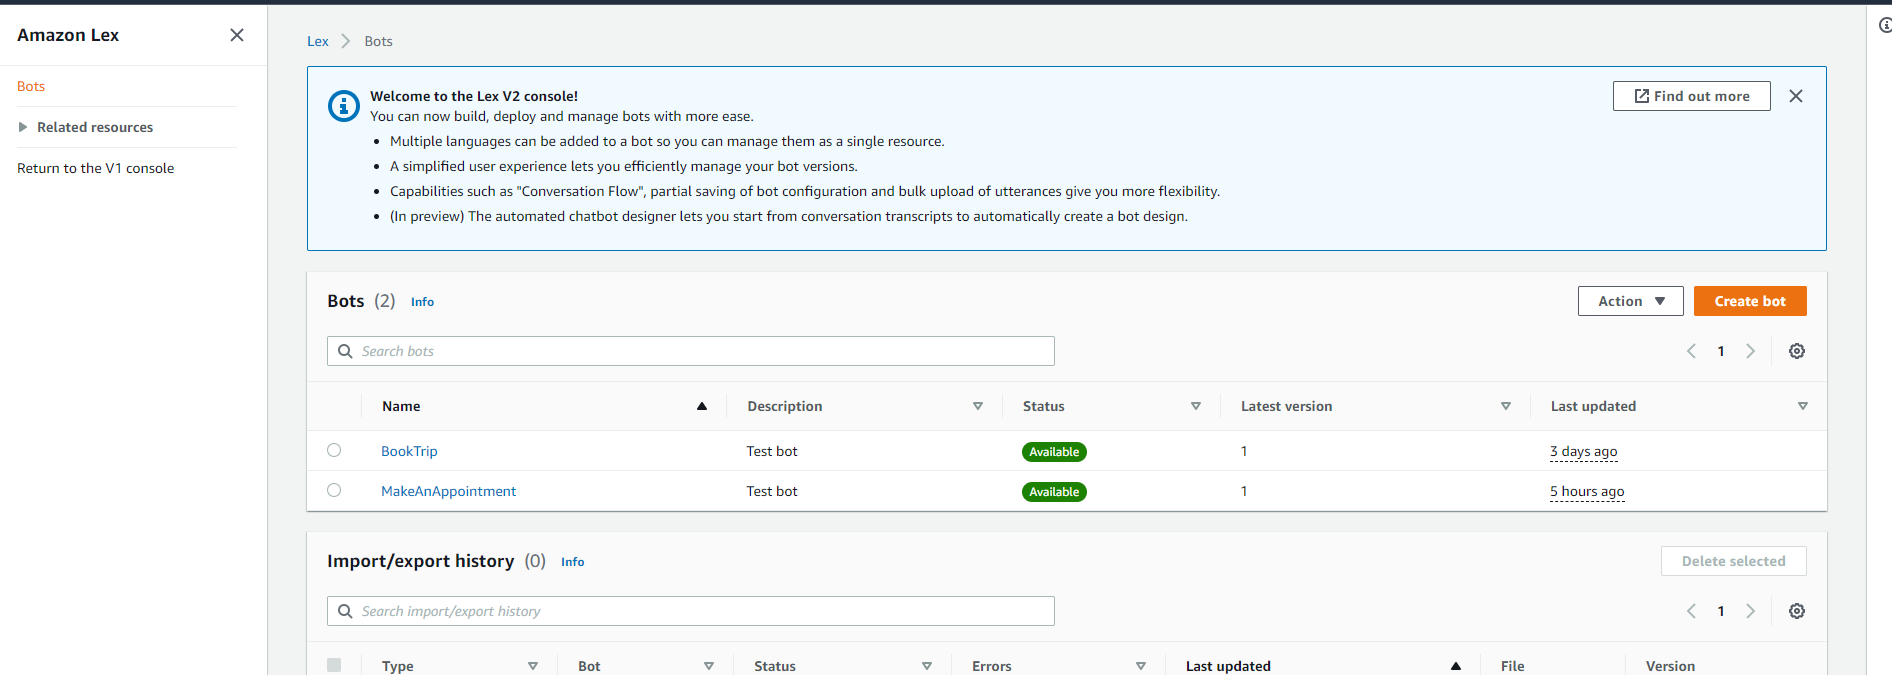
3. To create a new bot, click Create bot
4. Choose whether you are creating a bot from blank or from an example
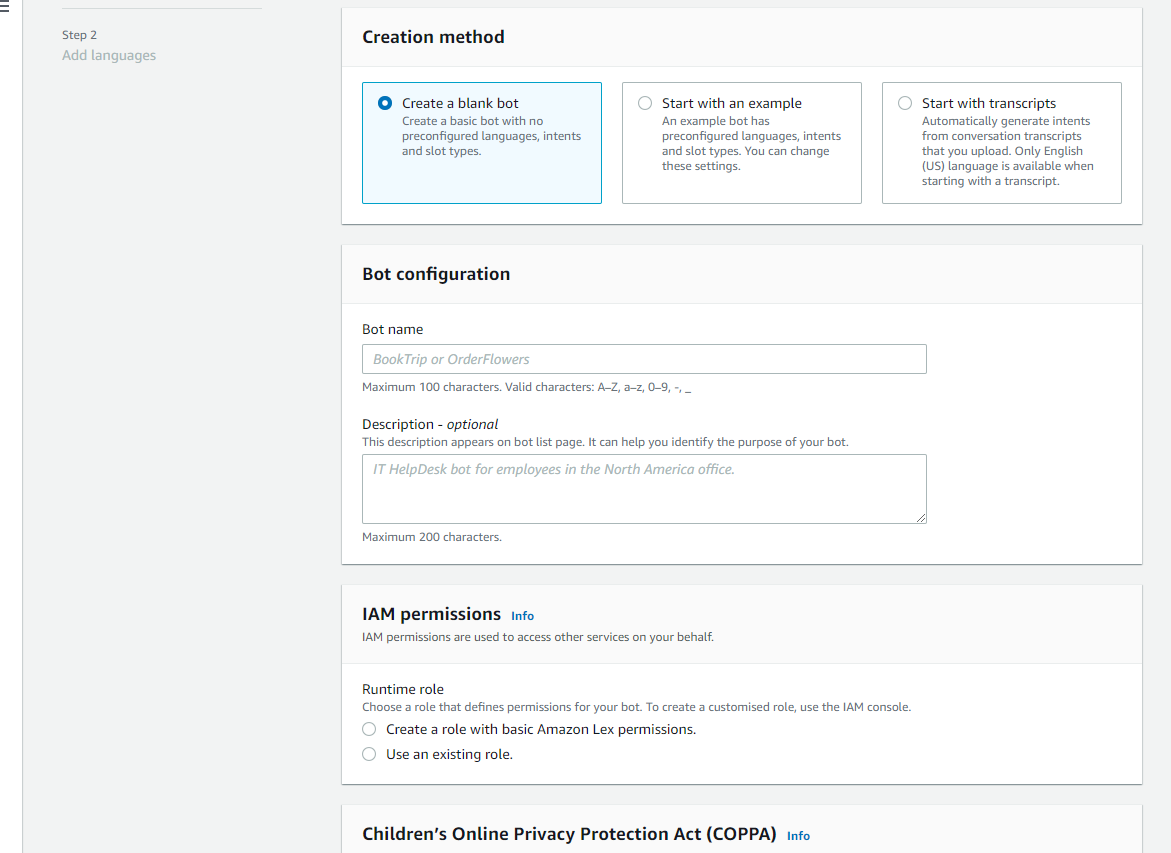
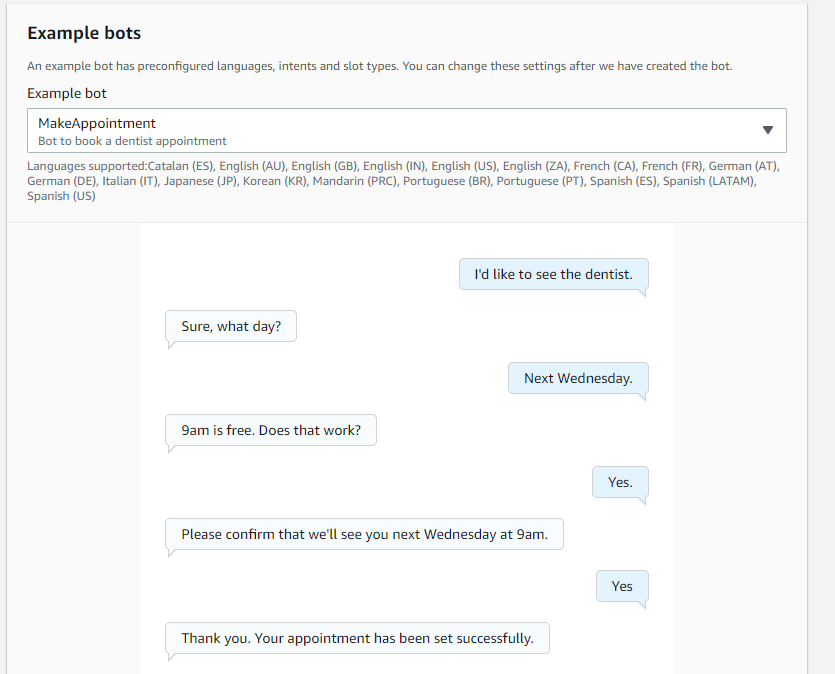
5. As an example choose an Example. In this case Make an Appointment
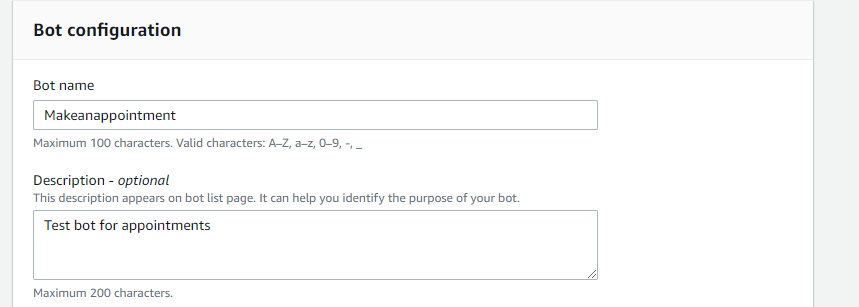
6. Give the Bot a name.
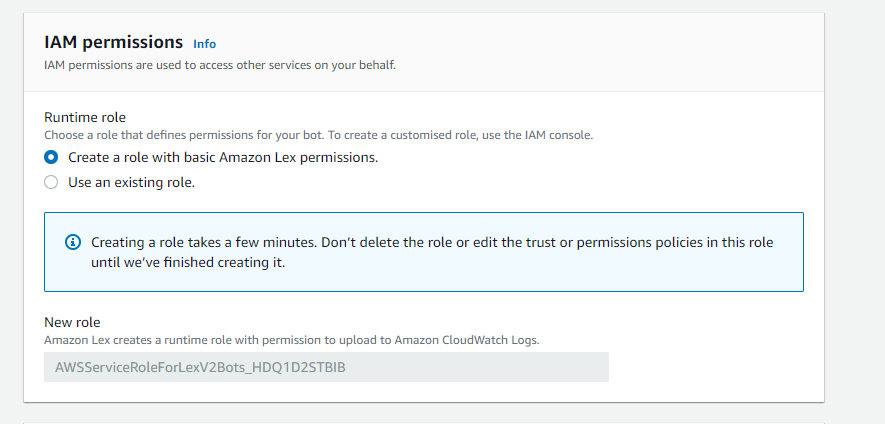
7. Set the IAM permissions
8. Coppa is set in this example to No. You may want to set it to yes.
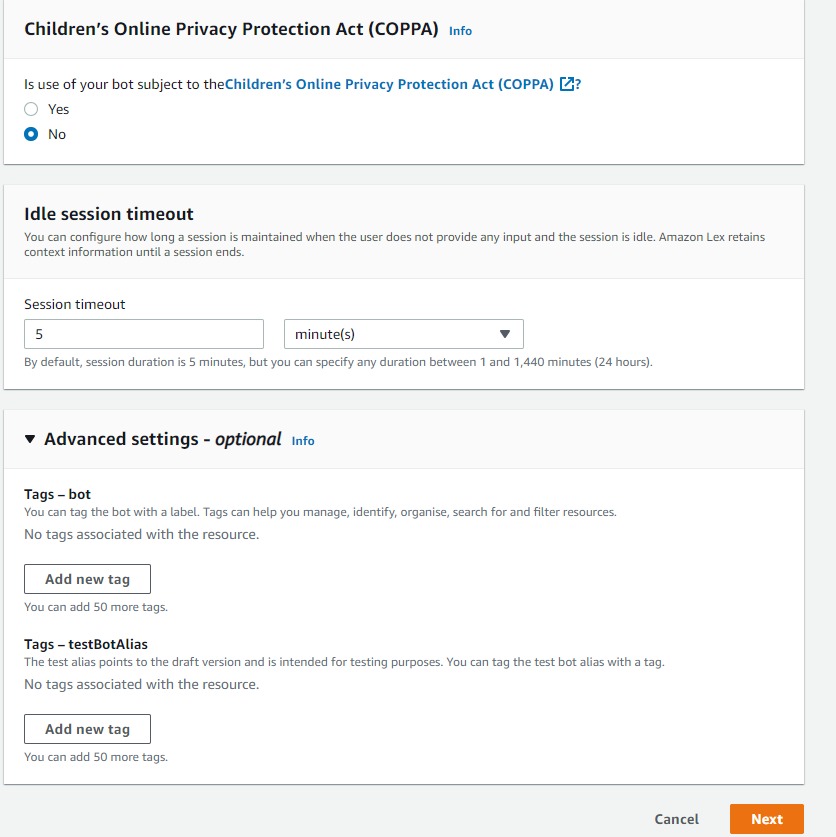
9. No tags are set in this example, click Next.
10. Choose the language you want to use
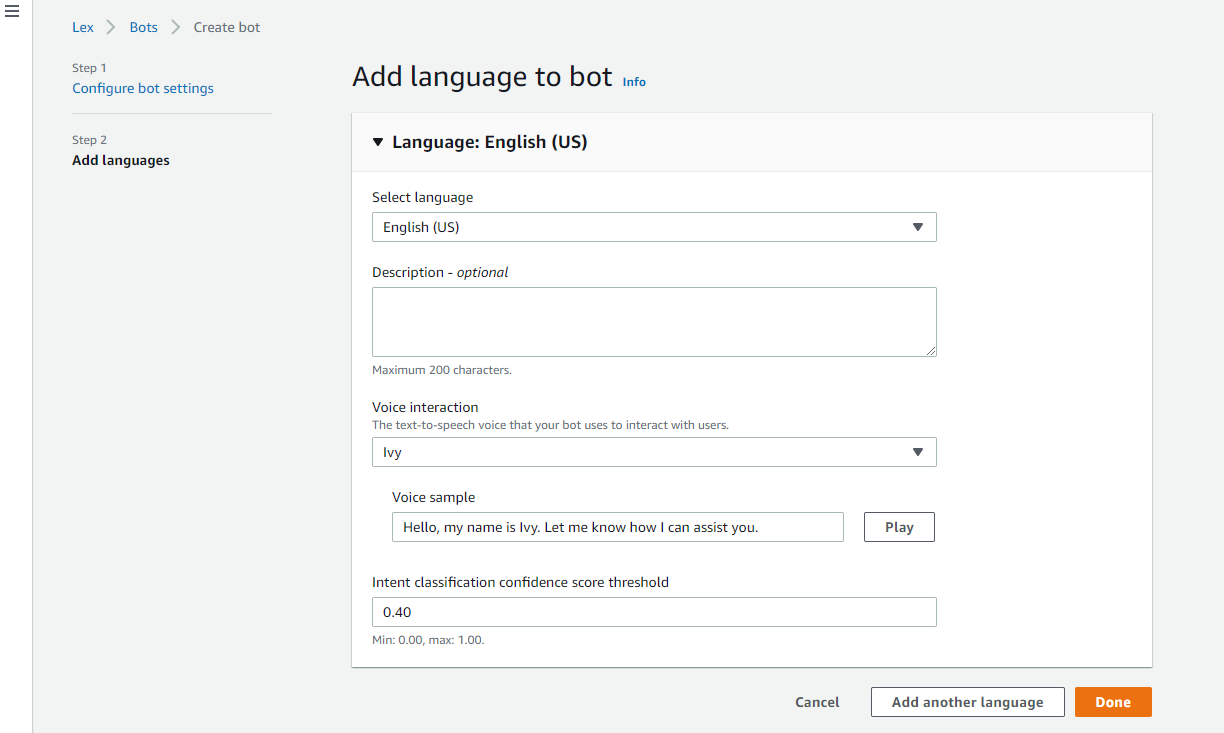
11. Click Done
Further information on Intents, sample utterances, slots can be found online or in the AWS information.
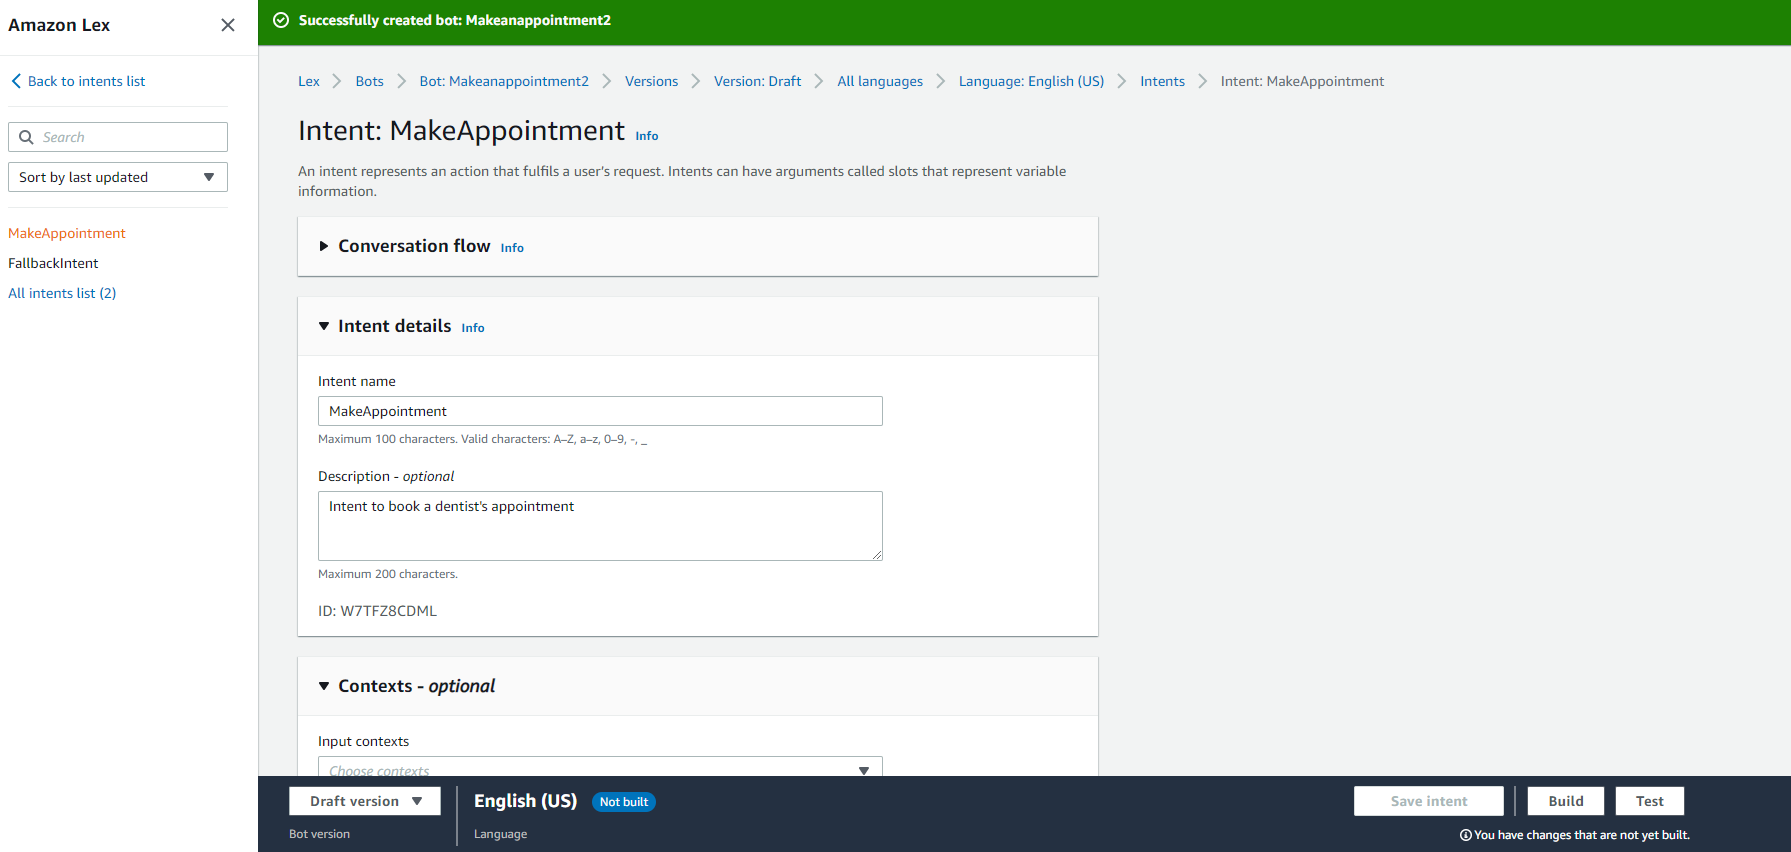
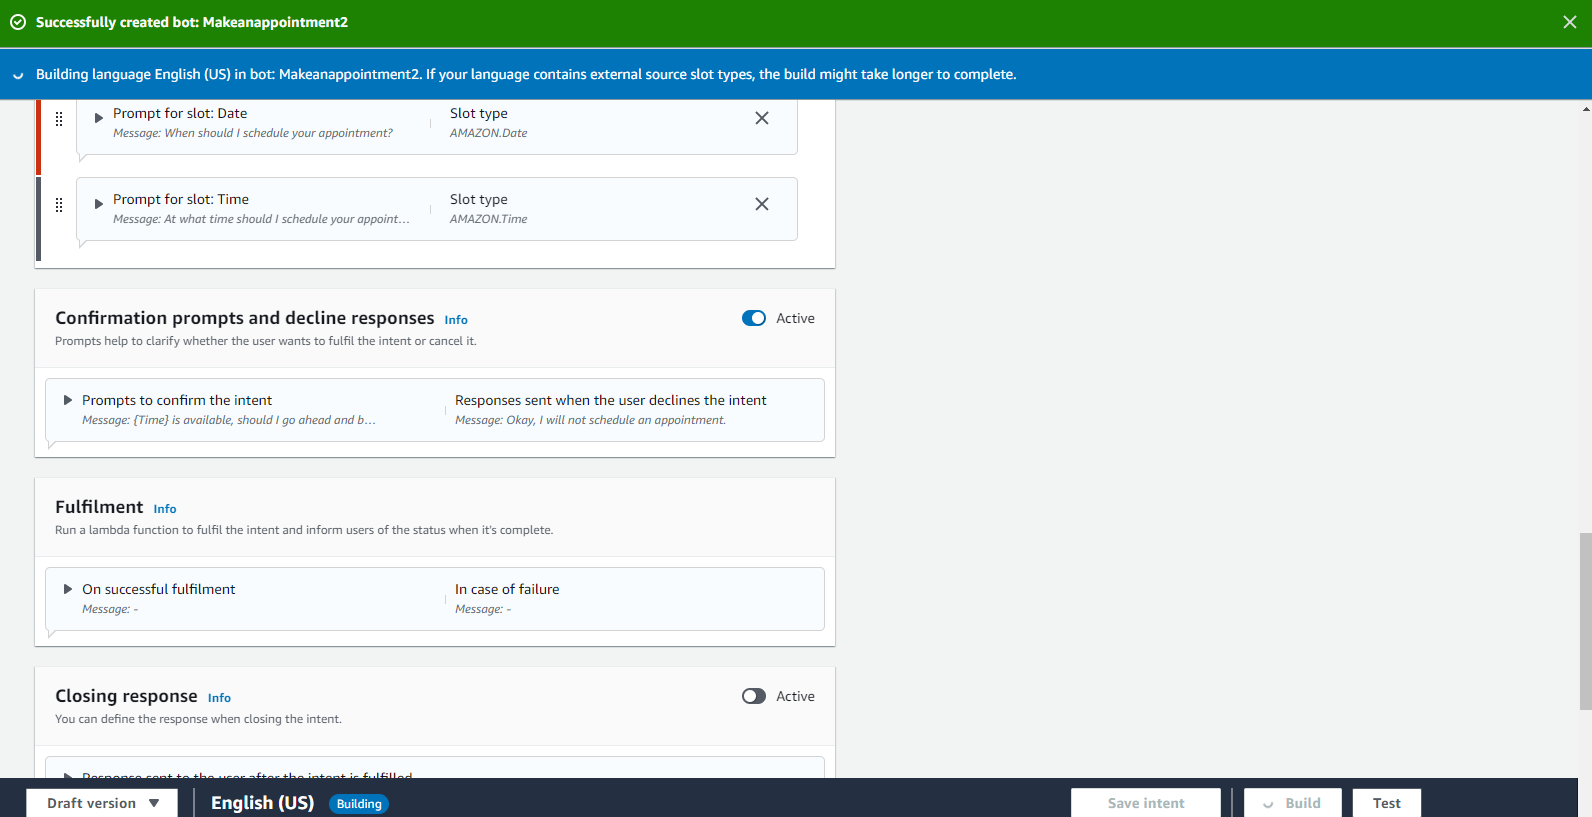
12. The intention here is just to show the basics of creating a bot, therefore we will just accept the information provided and click Build.
13. Next, you can test the bot. Click Test
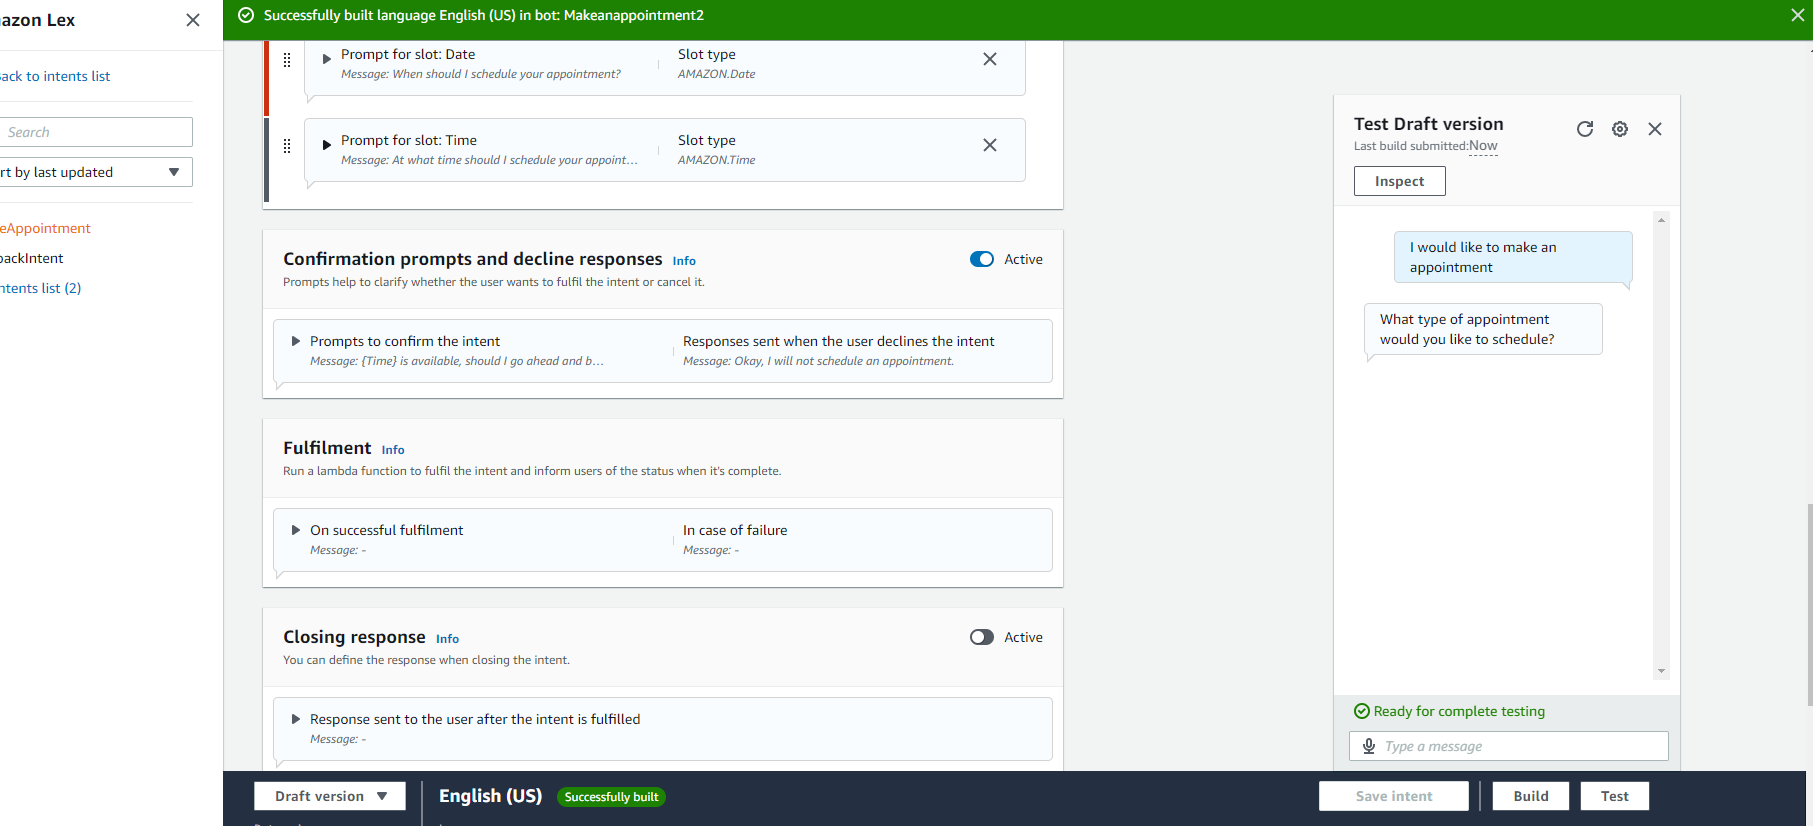
14. Test complete
15. Click on the AWS symbol in the top left hand corner and go back to the console.
16. The new bot is shown in the list of Bots.
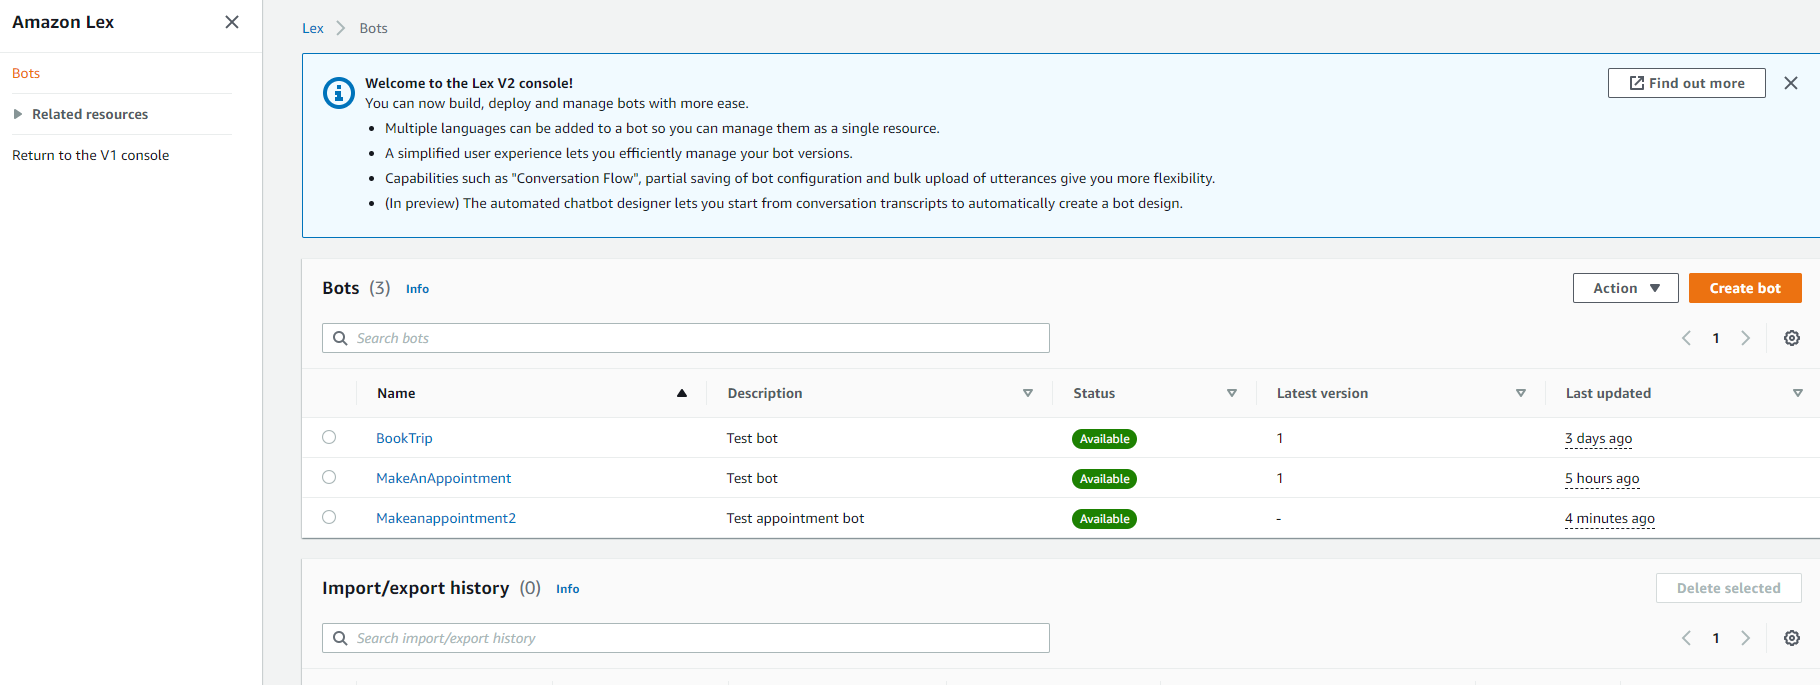
17. Click on your latest bot. In this case Makeanappointment2
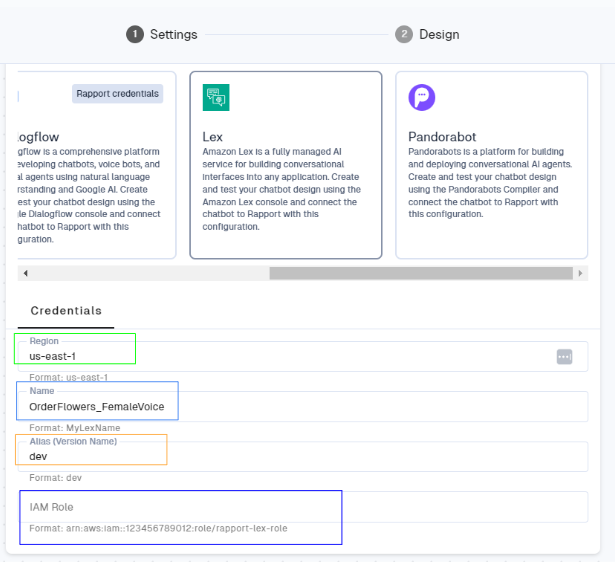
We need to provide an alias.
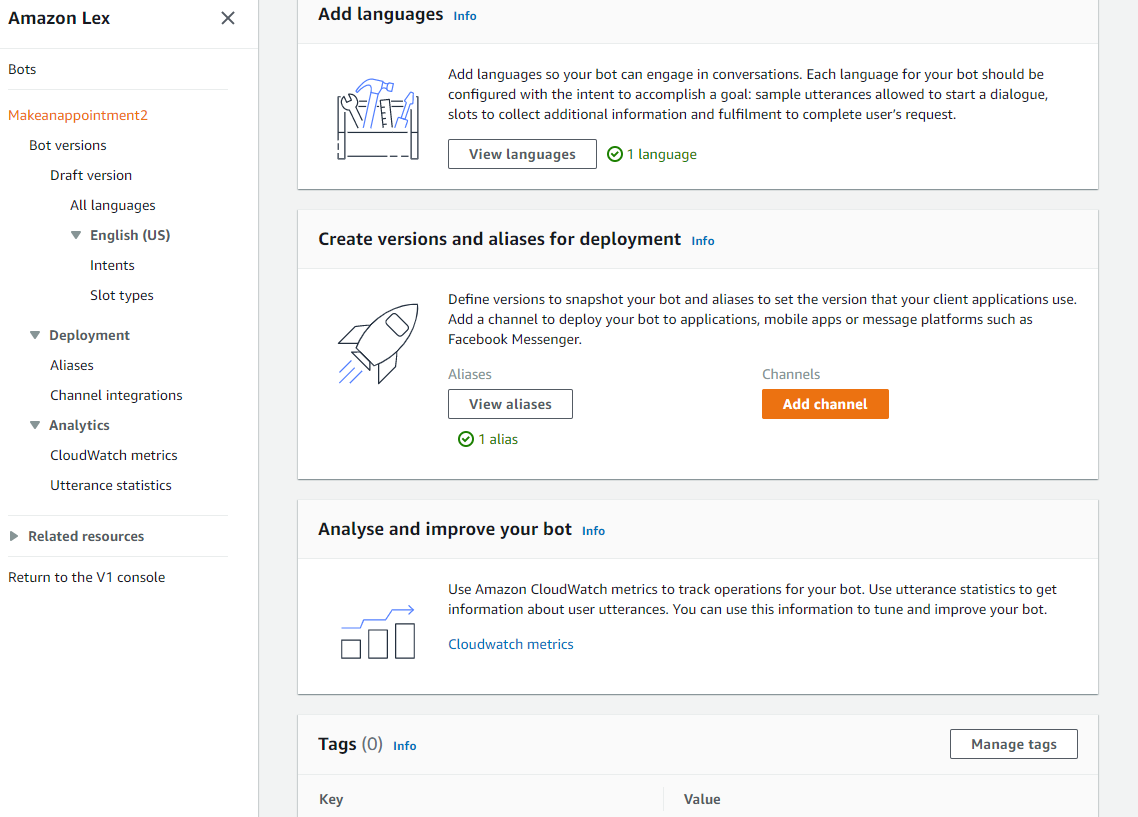
18. Click on Aliases

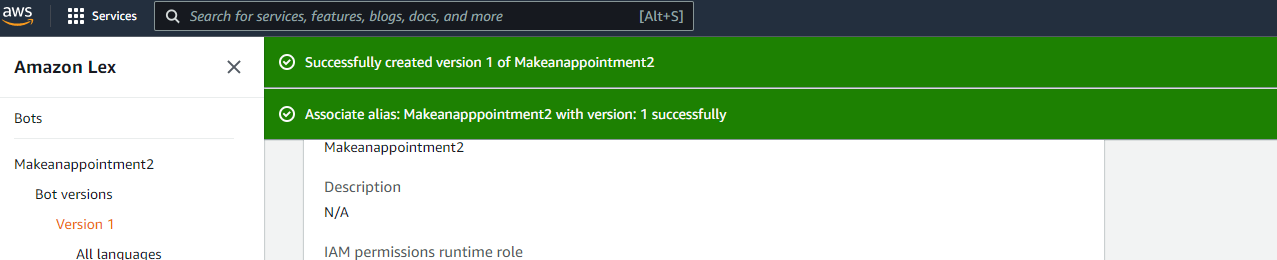
19. Create a version of the bot that can be used. The draft version should not be used.
Click on Bot Versions
And then Create Version
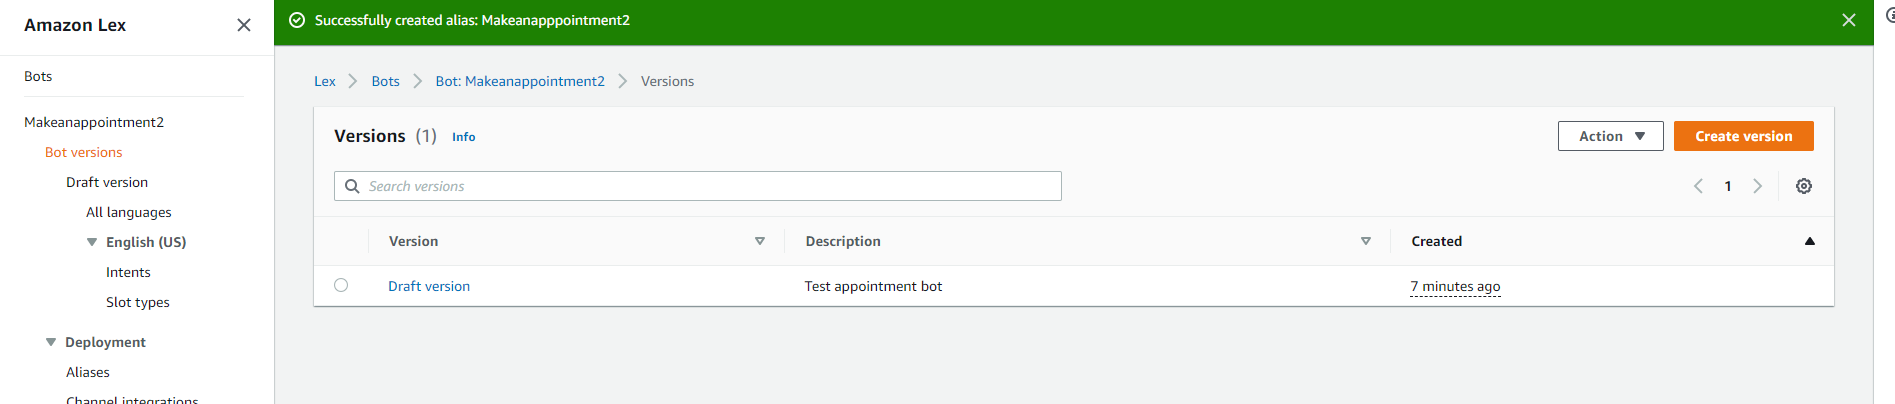
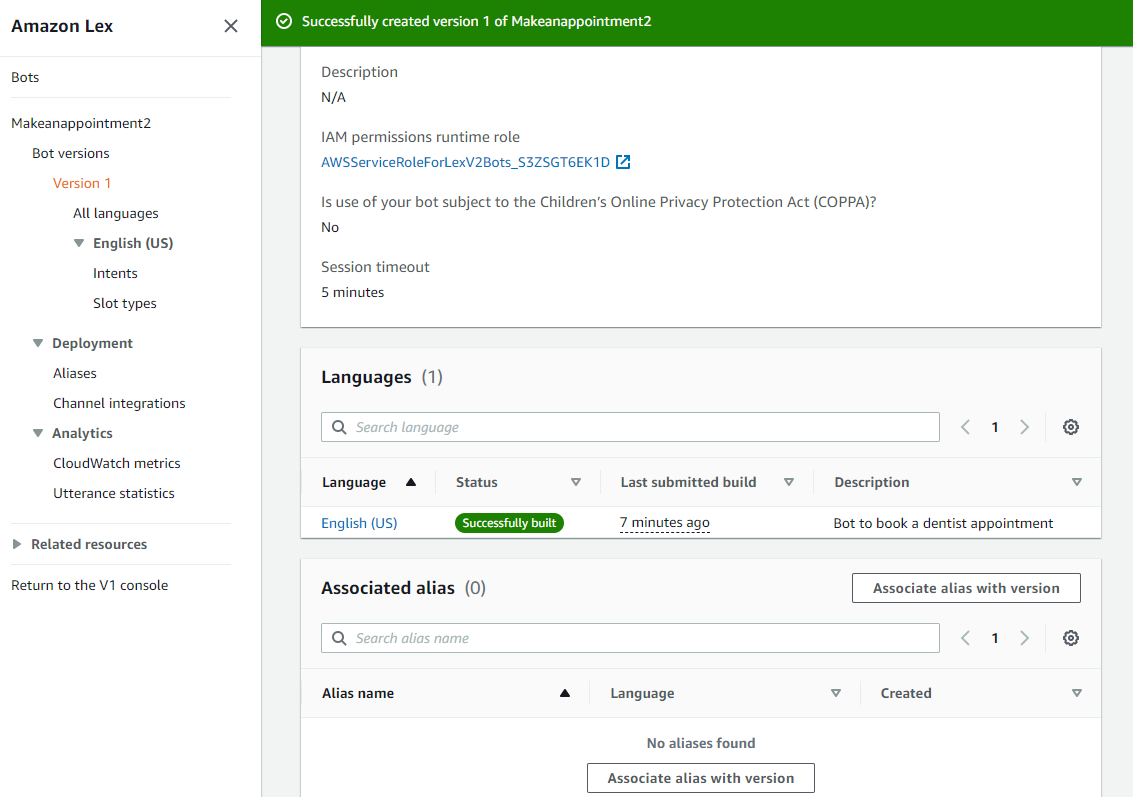
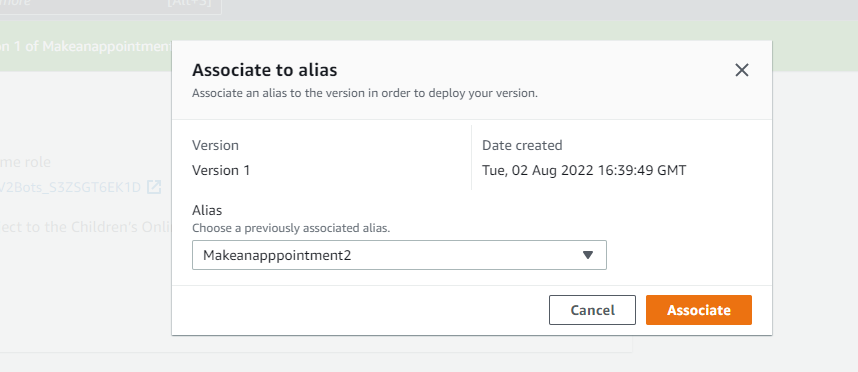
Version 1 has been created. We now assign the previously created alias to the version>.
Click on the Version

And associate alias with Version
20. The bot has been created, we now need to associate this with Rapport.
How to give access to your Lex bot for Rapport
In order for Rapport to visualize your Lex bot creation, you’d have to grant read access for us. By giving this type of access, we won’t be able to modify anything, just direct conversations to your bot’s way and get its responses back for visualization. To give access, please follow these steps:
-
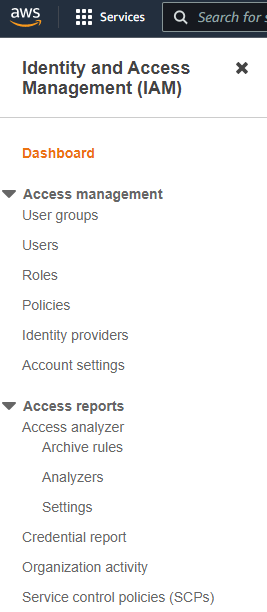
Log in to your AWS console and navigate to IAM.
-
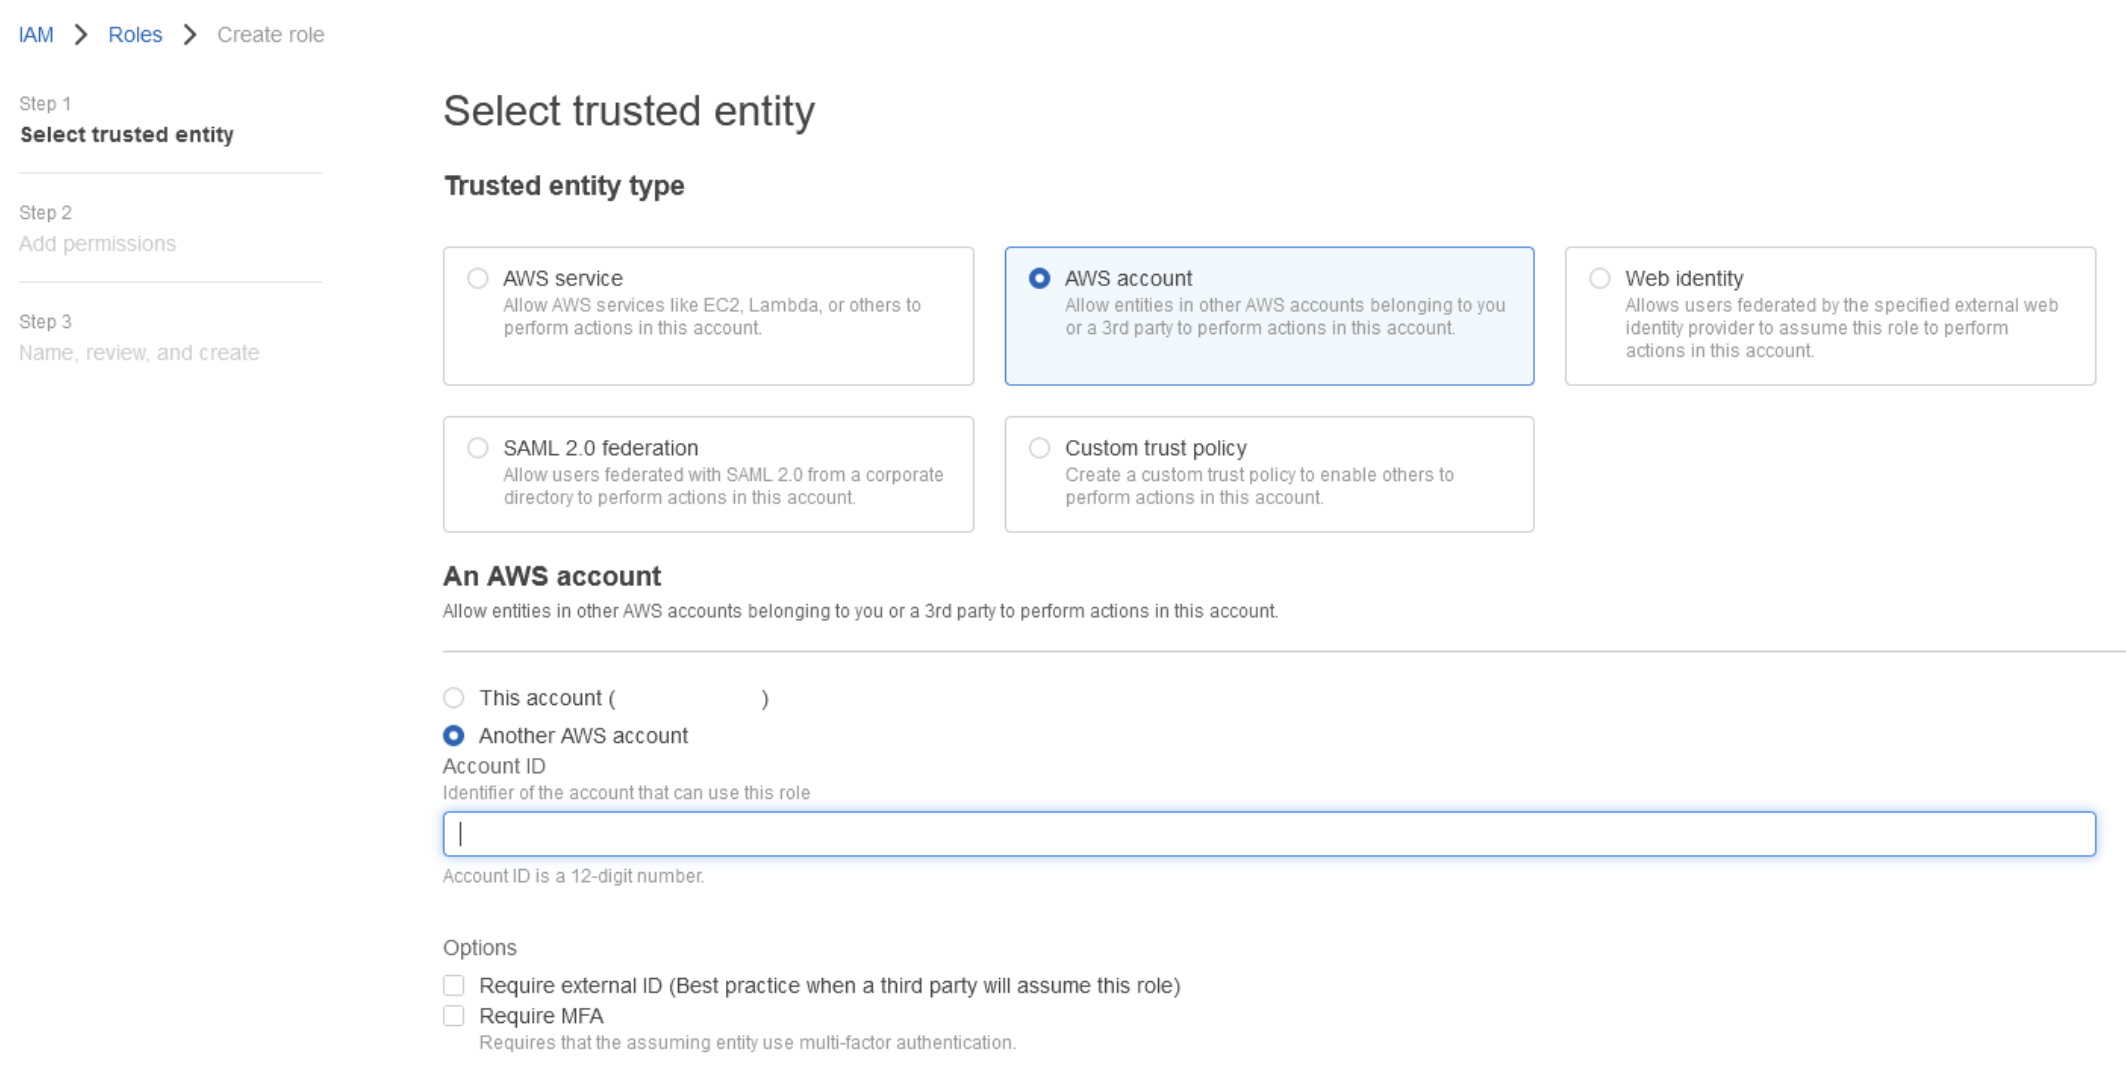
Select Roles on the left under Access management and press the Create Role button. Complete the form as follows:
21 Click on Services
Select IAM on the Right hand panel
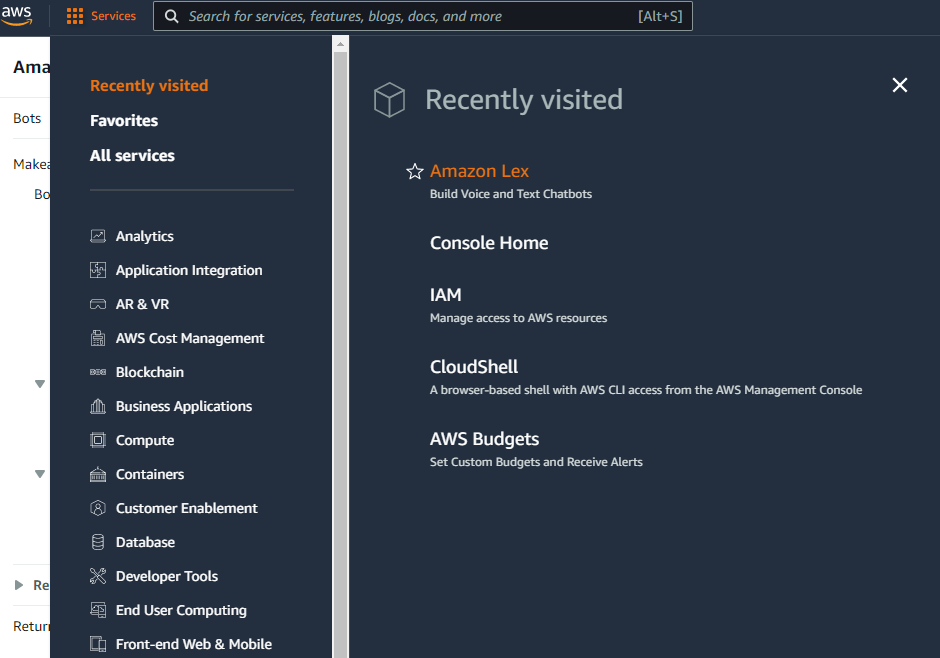
Then choose Roles
22 Create a role

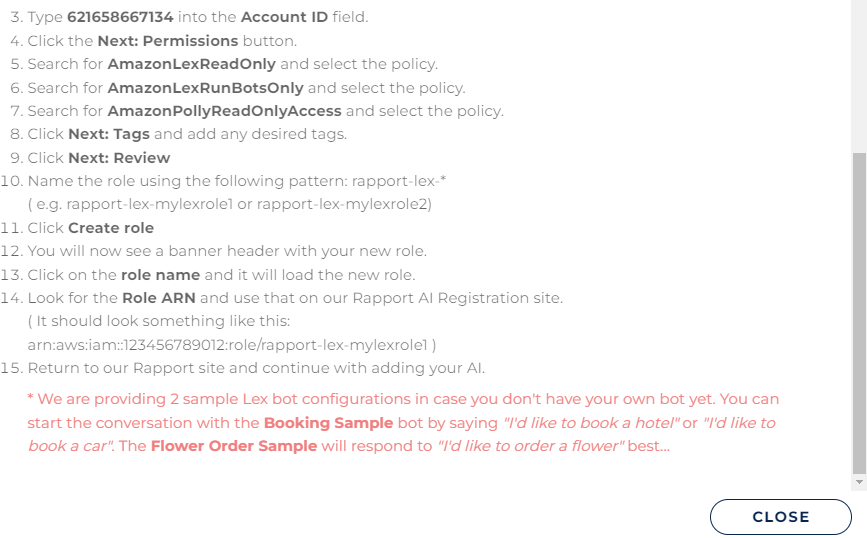
Enter 621658667134 into the Account ID field.
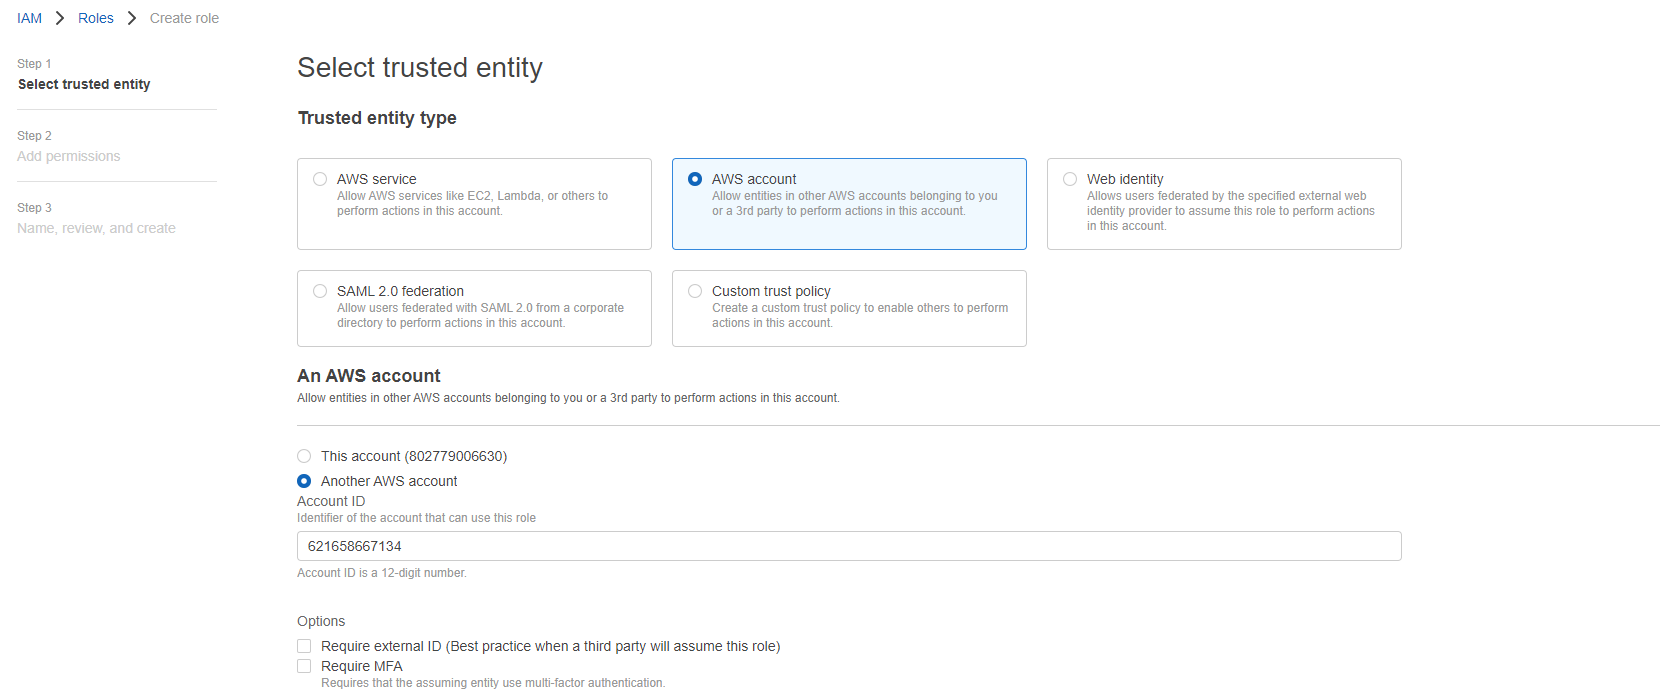
Then click Next
Enter Lex in the search field and
-
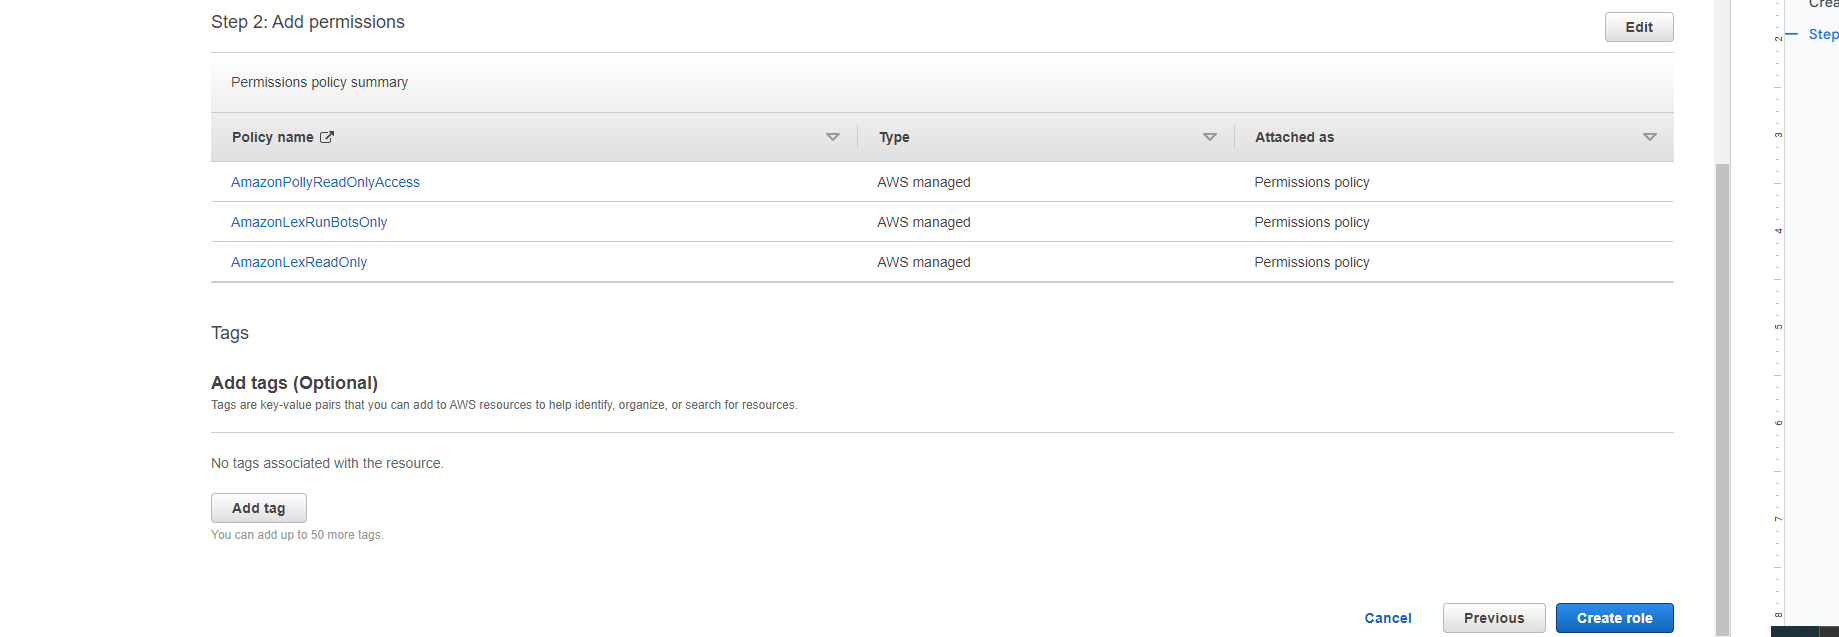
Search for AmazonLexReadOnly and select the policy.
-
Search for AmazonLexRunBotsOnly and select the policy.
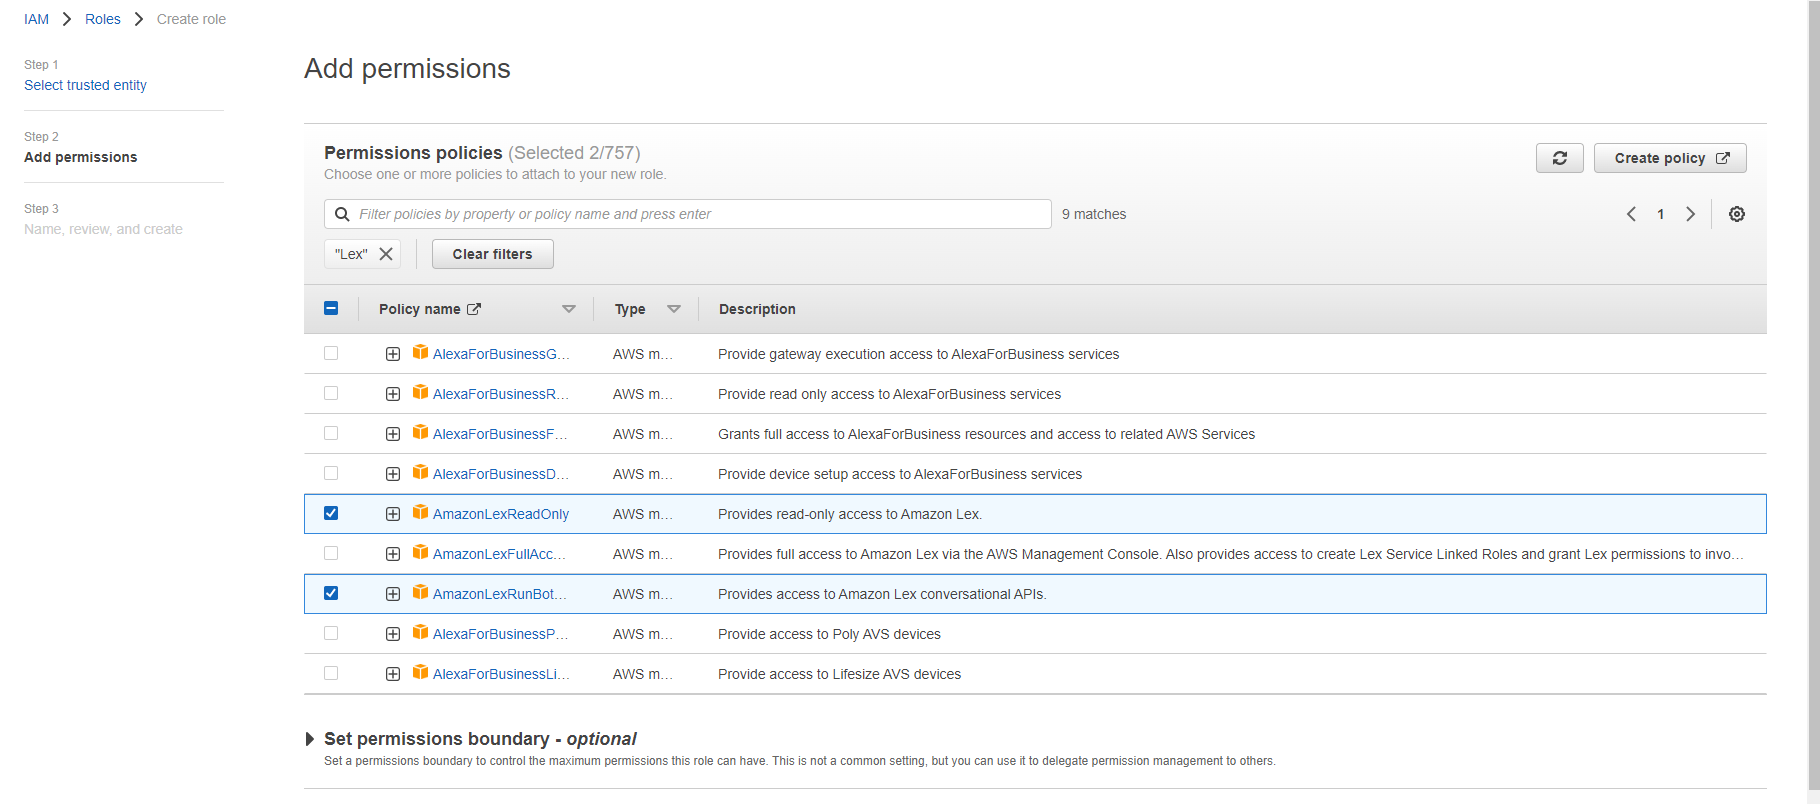
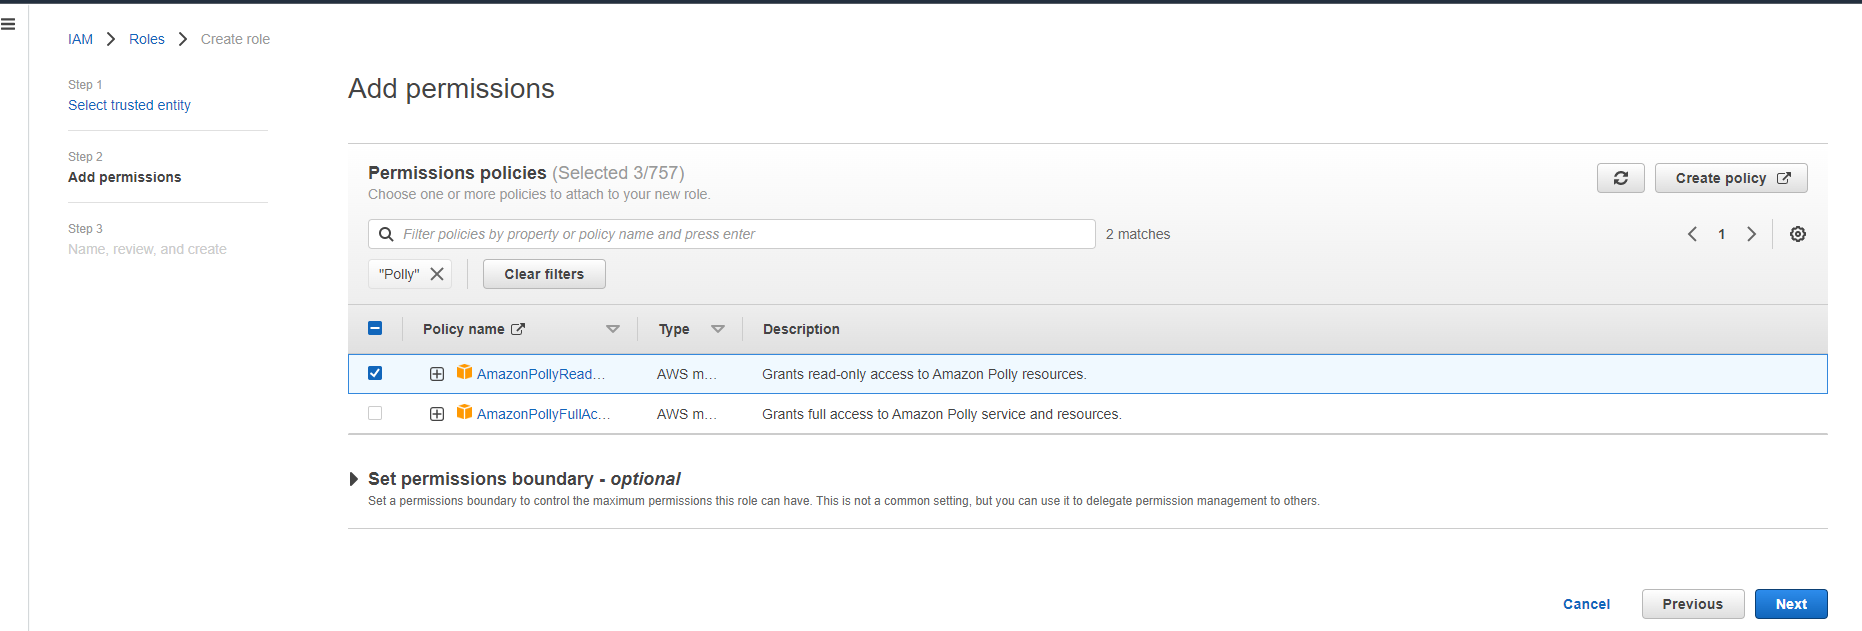
3. Search for AmazonPollyReadOnlyAccess and select the policy.
Enter Polly
4. Click Next
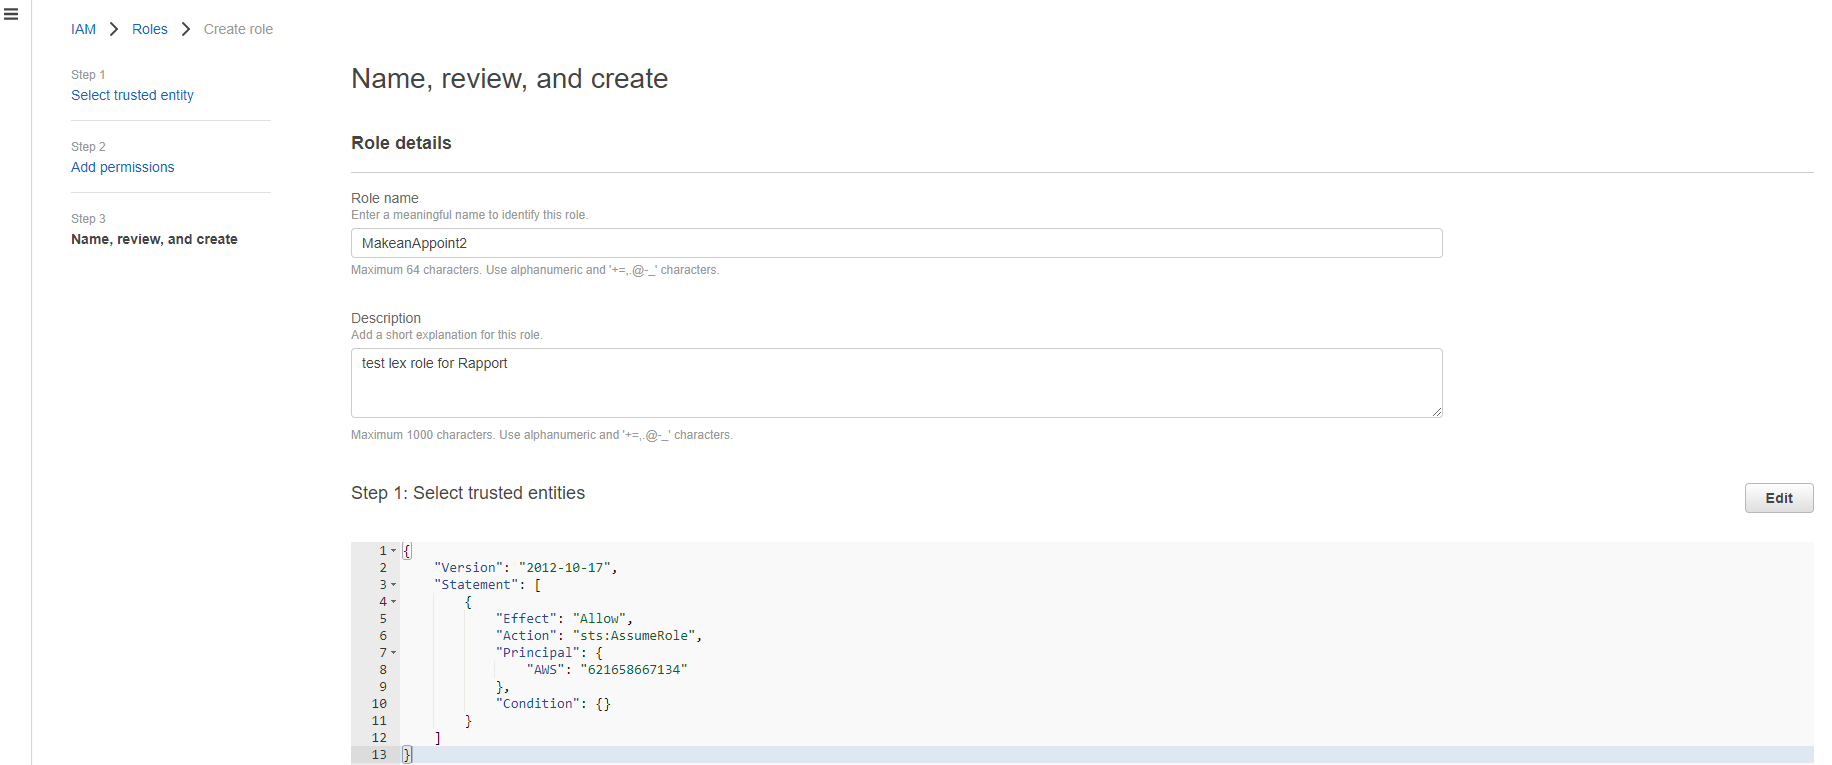
Enter the name and description of the role
At the bottom of the screen click CREATE Role
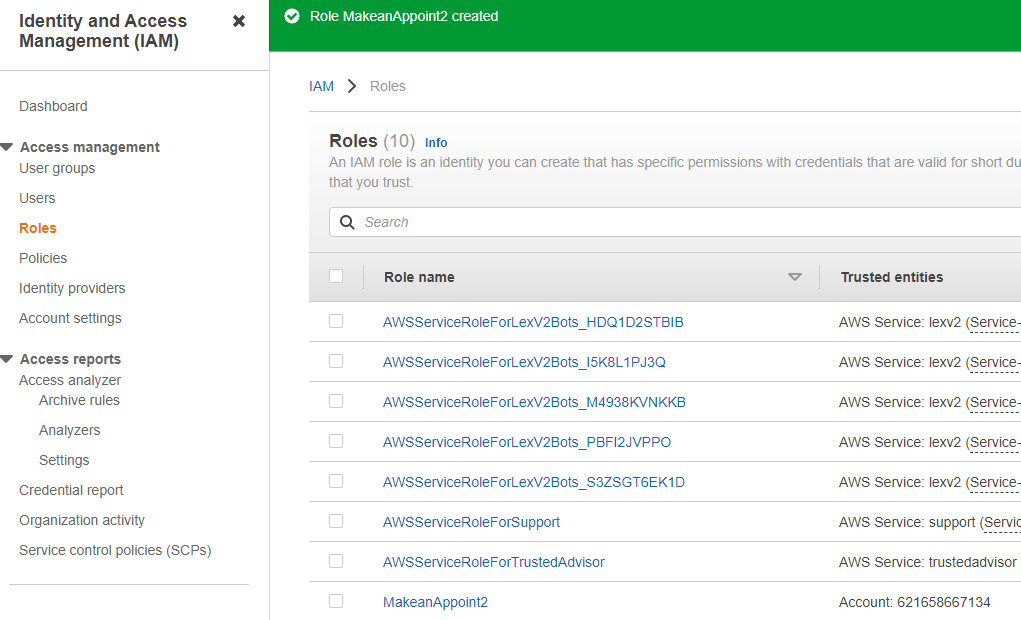
Click on the role your created, in this case MakeanAppoint2
23 Here you will find the details that are required for linking with Rapport.
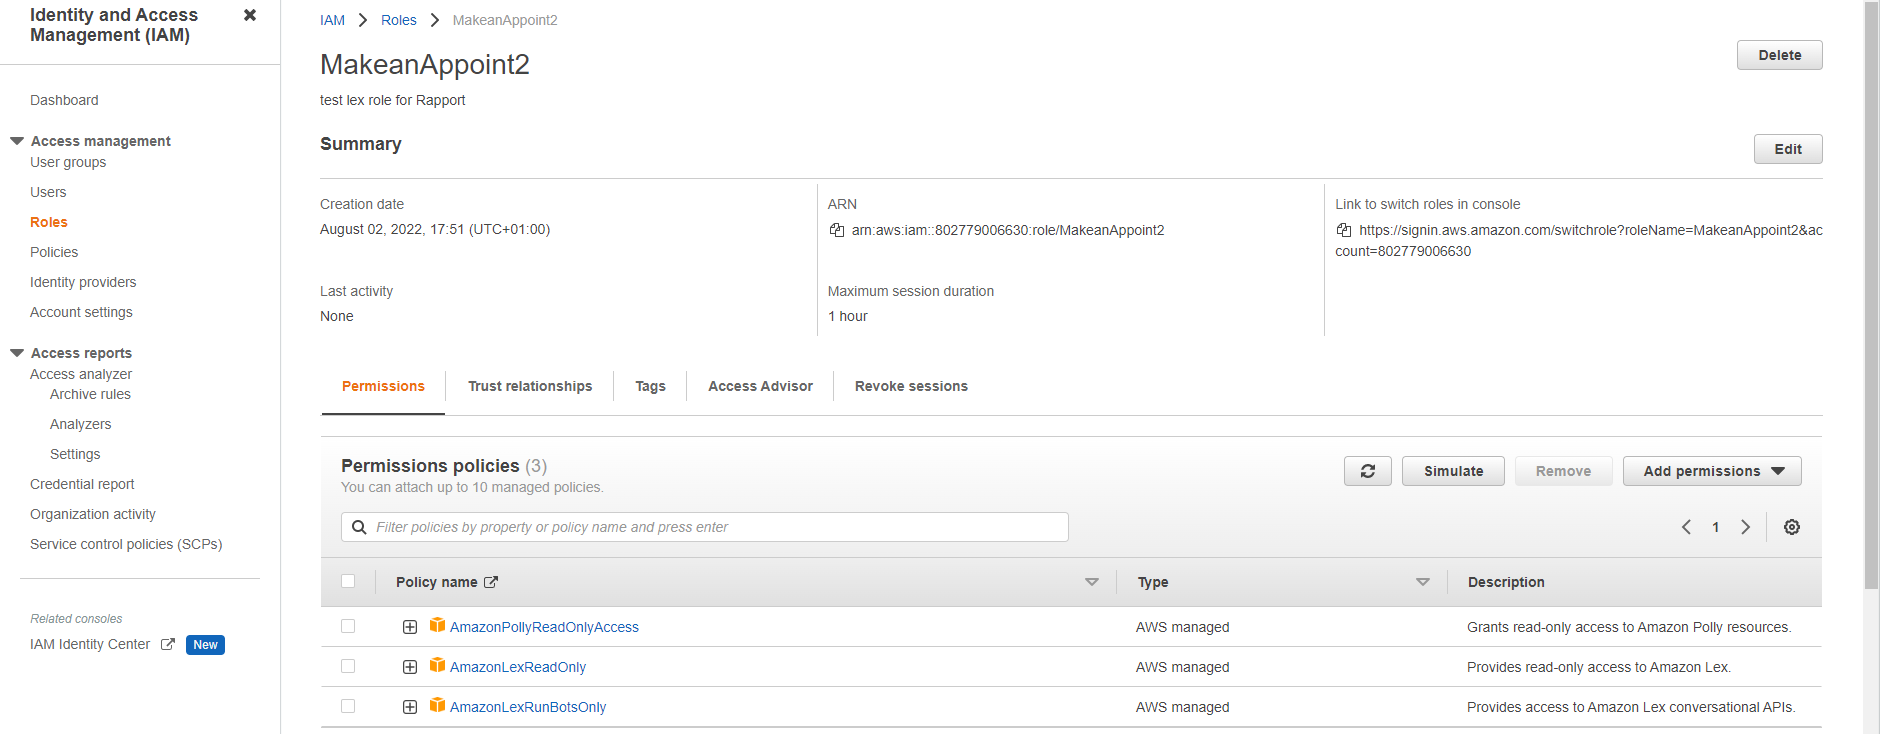
It’s the ARN number in the middle.
-
Click on the role name and it will load the new role.
-
Look for the Role ARN and use that on our Rapport AI Registration site.
( It should look something like this:
arn:aws:iam::123456789012:role/rapport-lex-mylexrole1 )
In this case arn:aws:iam::802779006630:role/MakeanAppoint2
24 Then enter your details in Rapport. As an example
The Name should be the name of your Bot
The alias should be the alias associated with your Bot
The IAM role should be the information from the ARN field in amazon.
Then submit.