
Overview
Advanced Settings give you fine-grained control over how a project behaves — including AI logic, speech recognition (STT), voice output (TTS), translation, extensions, and reporting.
Most users can create and launch projects using the default settings in Project Setup.
Advanced Settings are available for developers and Workspace Admins who need deeper control, such as:
-
Switching AI, STT, or TTS providers
-
Reusing services from My Services
-
Adjusting prompts and response behavior
-
Enabling Extensions (such as the Behavior Mode Extension)
-
Configuring analytics and reporting
💡 Tip: If you’re new to how services work, start with the Services Overview to understand Rapport Services vs My Services.
Where Advanced Settings Live
Advanced Settings always apply to the current project.
You’ll encounter them in two main places within Project Setup.
Option 1: From the Left Menu
Select Advanced in the Project Setup sidebar to view all available tabs:
-
AI
-
STT
-
TTS
-
Translation
-
Developer Settings
This is ideal when reviewing or configuring multiple areas in one place.
Option 2: From AI or Voice Settings (Recommended)
You can also open Advanced Settings directly from the relevant project menus:
-
AI → Click the currently selected AI service
-
Voice → Click the currently selected TTS service
This opens Advanced Settings focused on that specific service.
💡 This is the most common path when switching providers or adjusting prompts.
Important: How the Advanced Settings UI Works
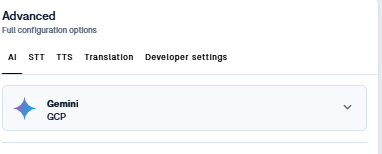
When you open an Advanced Settings tab (AI, STT, or TTS), only the currently active service is shown at first.
Additional options — such as My Services, Rapport Services, and Preferences — are hidden until you click the active service accordion. Fig 1
Fig 1: Example of an active service. Click here to expand the options shown
Once expanded, you’ll see:
-
Alternative providers
-
Any Workspace-level services
-
Editable configuration options
This keeps the interface clean while still allowing deep configuration when needed.
Common Layout Across Tabs
Each Advanced Settings tab follows the same structure:
Active Service
Shows the provider currently applied to the project.
My Services
Workspace-level integrations created by Admins.
Includes ➕ Add Service (Admins only).
Rapport Services
Preconfigured, ready-to-use providers included with your plan.
Preferences
Provider-specific options such as:
-
Model selection
-
System prompt
-
Voice parameters
-
Response tuning
💡 A Manage Services link at the bottom of each tab takes you to
Workspace → My Services for organisation-level management.
AI Tab
Accessed from AI → Select service.
Includes:
-
Active Service (e.g. ChatGPT, Gemini, Groq)
-
My AI Services (Admin-managed)
-
Rapport AI Services (defaults)
-
Developer Options (e.g. Idle, Echo)
Preferences allow you to:
-
Define the System Prompt
-
Adjust temperature and token limits
-
Enable advanced model parameters
TTS Tab
Accessed from Voice → Select service.
Controls how speech is generated.
Includes:
-
Rapport Voice Pack (default)
-
Custom TTS providers (e.g. Azure, ElevenLabs)
-
Voice filtering by language, gender, or name
Use ➕ Add TTS Service to register new credentials (Admins only).
STT Tab
Controls how spoken input is transcribed.
Includes:
-
Active STT provider
-
Rapport defaults (Whisper, Azure, Google, AWS, etc.)
-
Workspace-level custom services
💡 Templates automatically select a suitable STT provider and language.
You only need to change this when integrating a new provider.
Use ➕ Add STT Service to register new credentials (Admins only).
Translation Tab
Manages automatic translation within a project.
You can:
-
Enable or disable translation
-
Set input and output languages
-
Control how translation interacts with AI and TTS
Useful for multilingual or global deployments.
Developer Settings Tab
For advanced users, developers, and Workspace Admins.
Includes:
-
Debugging and logging options
-
Experimental feature flags
-
Voice Activity Detection (VAD) controls See: Voice Activity Detection Settings
-
Extensions, including the Behavior Mode Extension
-
Relativ AI Reports
Extensions
Extensions modify how a project behaves at runtime.
Some templates already include extensions preconfigured.
See: Extension – Behavior Mode
Relativ AI Reports
Available within Developer Settings.
Relativ AI Reports analyse conversations in training or role-play scenarios, producing structured feedback on areas such as tone, empathy, and clarity.
-
Report types are preconfigured by Rapport
-
Templates that include reports are tagged “Report Included”
-
Selection is managed at project level
For full details, see Project Setup: Relativ AI Reports.
Best Practices
✅ Start with defaults — Rapport Services work out of the box
✅ Expand accordions to reveal configuration options
✅ Copy prompts before switching AI providers
✅ Use My Services for compliance or billing control
✅ Preview changes live — updates apply immediately
Why This Matters
-
Flexible — tailor behavior per project
-
Secure — credentials are encrypted
-
Scalable — reuse services across projects
-
Insightful — reports enable measurable feedback