
Quick Start Guide: Creating Projects with Rapport
A faster, cleaner way to build AI-powered experiences—designed with you in mind.
Whether you're a first-time creator or returning to explore new features, Rapport’s updated interface helps you go from concept to live AI interaction in seconds.
Step 1: Sign Up or Log In
Visit rapport.cloud to create an account or log in.
Step 2: Create Your Workspace
Your Workspace is where all your Projects, Assets, and Settings are managed.
From the dashboard, click Create Workspace
Name your workspace—it becomes your creative hub
Step 3: Create a New Project
Inside your Workspace, click the Create New Project button.
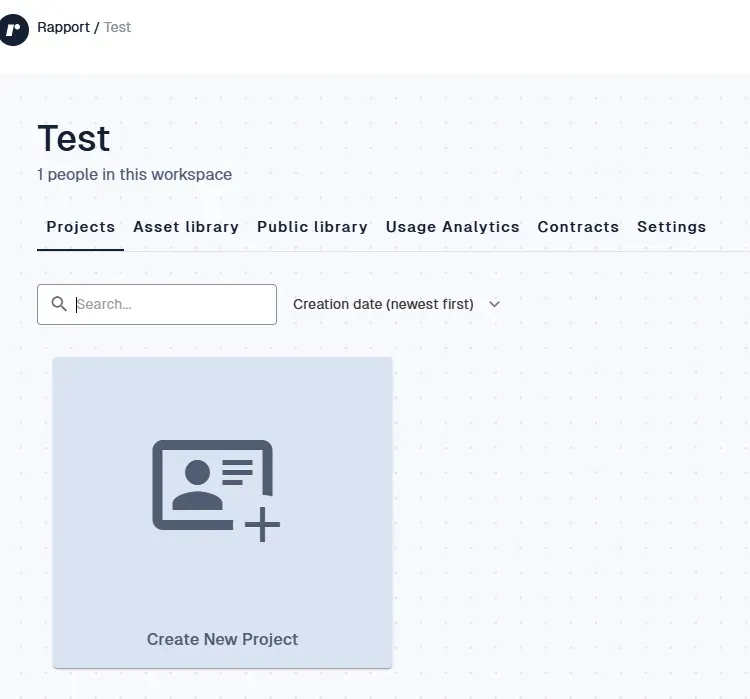
You’ll then:
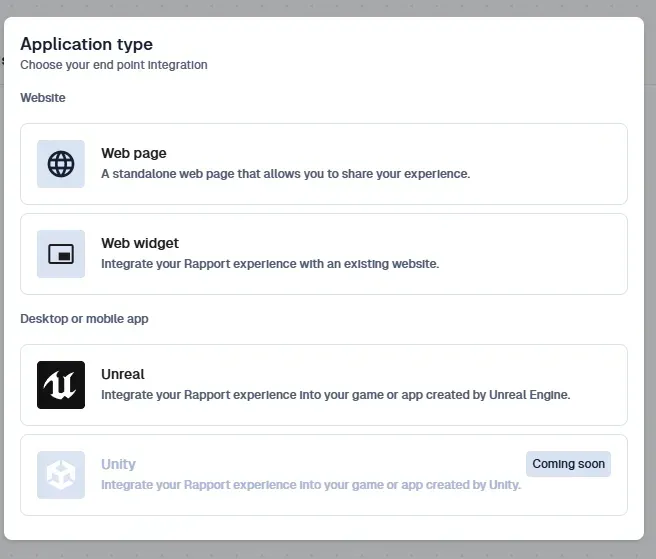
3.1 Choose an Application Type
Decide how you want to deliver your experience:
Web Page – Standalone page for quick sharing
Web Widget – Embed into an existing site
Unreal – Integrate into your game or 3D application
Unity – (Coming soon)
For a comparison of the application types Web page vs Web Widget click here
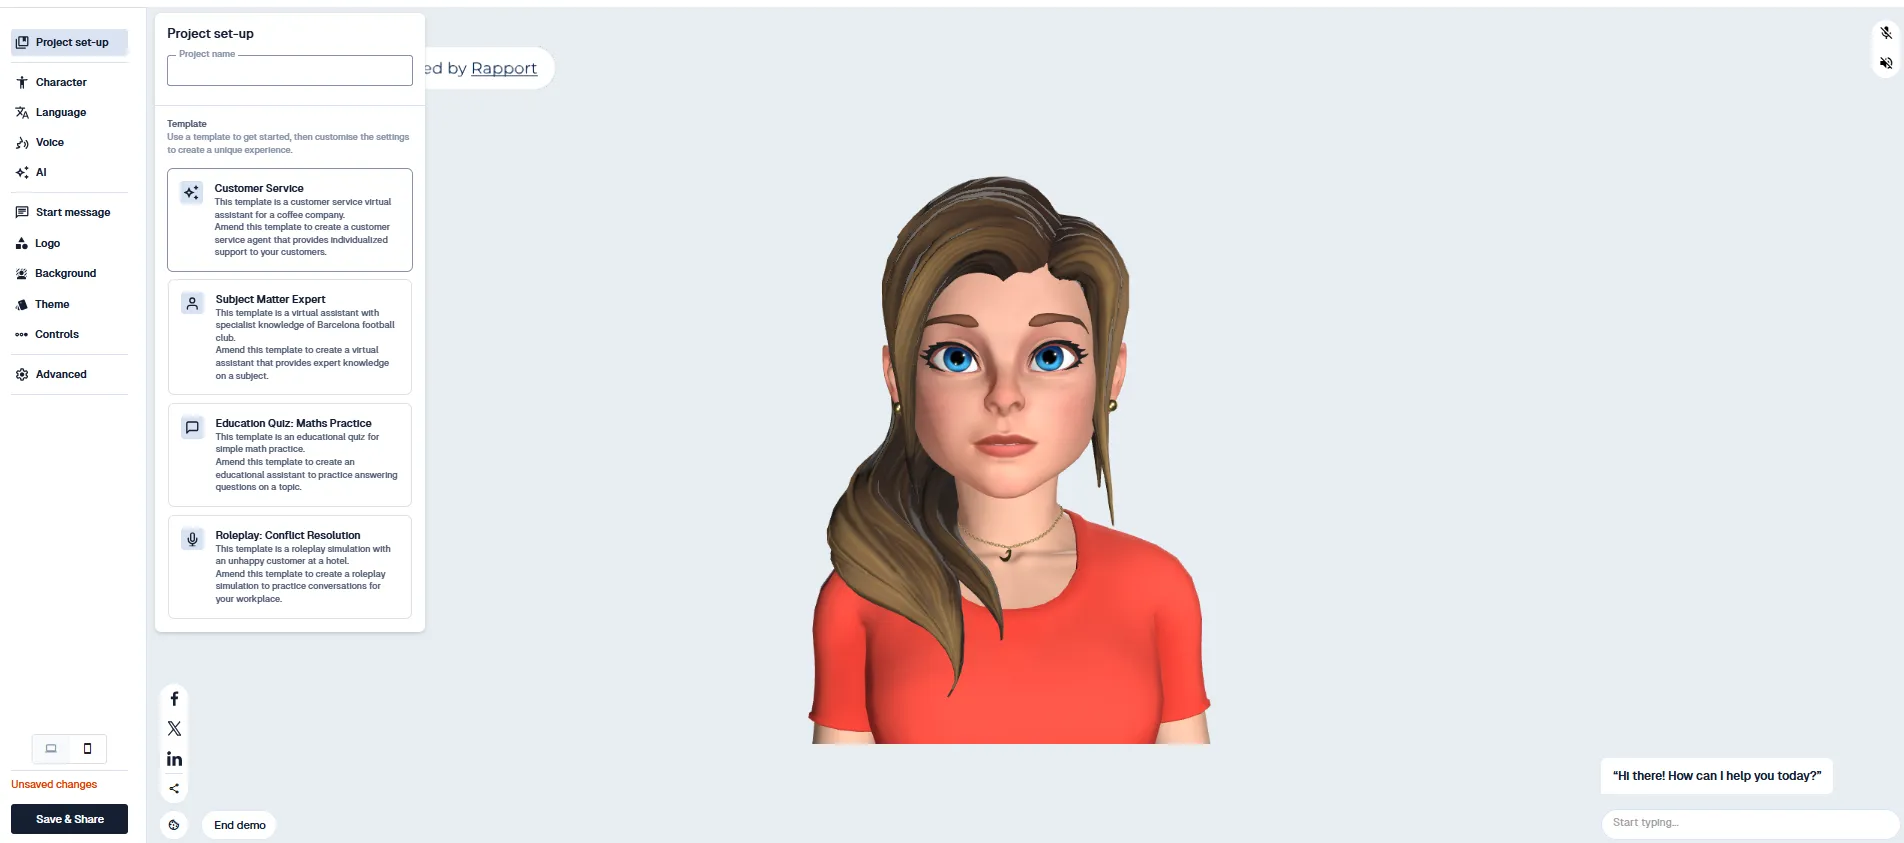
3.2 Start with the Default Template or Choose a Template & Start customizing
Once you've selected your application type, you'll be taken to the Project Setup screen.
By default, a template is automatically selected — you'll see it highlighted with a darker border.
This means the character, voice, AI type, and prompt are all pre-configured, making it quick and easy to start experimenting.
You can:
Use the default setup, or
Choose a different template that better fits your goal.
All key features are accessible via the left-hand menu, and you can preview your AI interaction in real time using the right-hand panel.
What Makes This So Simple?
Templates come pre-configured with AI, voice, and layout
Built-in validation ensures you don’t miss a step
Live preview panel shows real-time AI responses
Mic and speaker muted by default, easily toggled on/off
You’ll be building and testing your experience within seconds.
Left Menu: Your Control Hub
The left-hand menu in Rapport’s Project Setup interface is your central control hub. Whether you're customizing voice settings, adding characters, or configuring integrations, this menu gives you streamlined access to every core function
Menu Layout Highlights
The left-hand menu in Rapport is divided into two sections—Core Setup and Visual & Behaviour Customization—to streamline your project-building workflow.
Top Section (Above the Divider): Core Project Setup
These options help you define how your AI experience works:
Project Setup – Name your project and choose a pre-configured template to jumpstart your experience.
Character – Select a character from your workspace or the public library, or create a custom one.
Language – Set the spoken language for your session. This influences both voice and STT provider selection.
Voice – Choose from filtered voice options based on your selected language. You can also use a custom voice via Advanced Settings.
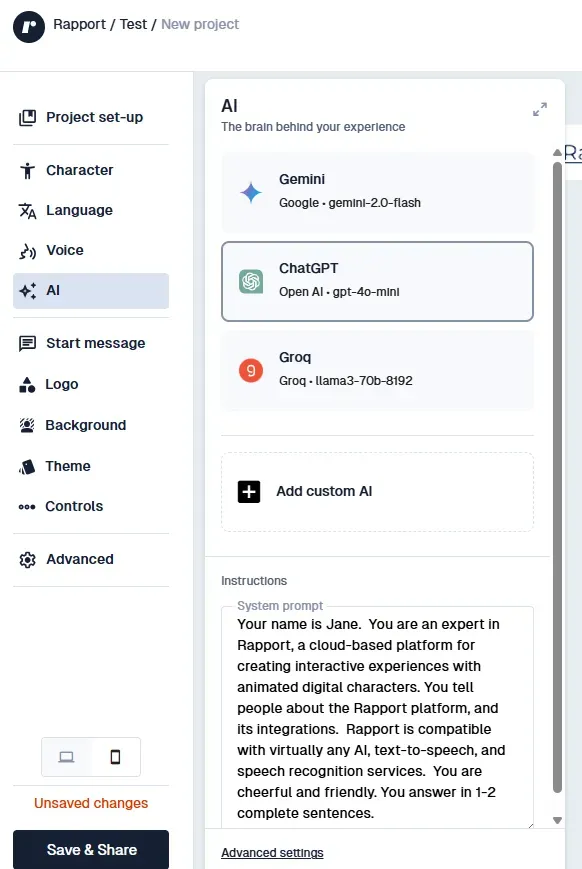
AI Settings – Select your AI provider, model, and prompt. Use advanced options to customise temperature, tokens, or credentials.
Bottom Section (Below the Divider): Layout, Branding, and Controls
These tools let you fine-tune the visual appearance and interaction behaviour of your experience:
Start Message – Set the opening line your character will say to begin a session. Supports plain text, scripts, or audio assets.
Logo (Web Page only) – Upload a custom logo for your experience, replacing the default Rapport logo.
Background – Choose a colour, gradient, or image background to match your brand.
Theme (Web Page only) – Define the visual theme and chat UI (font, colour, etc.) for the demo page.
Controls – Enable or disable features such as chat log visibility, push-to-talk, or social sharing. For Web Widgets, only the "Powered by Rapport" option is available here.
Advanced Settings – Access low-level configuration for:
STT (Speech-to-Text) provider and credentials
TTS (Text-to-Speech) provider and custom voices
AI model credentials and parameters
Translation and developer options
Advanced Settings stay tucked away in case you need full control. For most users, the main menu is all you’ll need to launch successfully.
Step 4: Interact Instantly
Your character will come to life in the right-hand panel
Click to unmute mic and speaker for full interaction
Update settings live and see results immediately
No extra deployment or manual syncing required
What’s Included in Your Toolkit?
Asset Library – Characters, scripts, and audio (yours + public)
Templates – Prebuilt flows to jumpstart creation
AI Integrations – OpenAI, Gemini, and Groq support
Voice Tech – Use AWS Polly, Google, Azure, or Eleven Labs
Multilingual Support – Speak globally with ease
Returning User?
All your existing Projects, Assets, and Workspaces are waiting for you. The new UI just makes them easier to manage, preview, and deploy.
Always Evolving
The Rapport platform continues to grow with:
New templates
Voice options
Characters
Integrations
Stay tuned for ongoing enhancements that keep your creativity moving forward.