
Project Settings
Project Settings in Rapport
The Project Settings page in Rapport allows you to configure various aspects of your interactive experience. The specific fields displayed depend on whether you choose to start your project from scratch or use a template. This streamlined approach ensures you only see relevant settings based on your project's foundation.
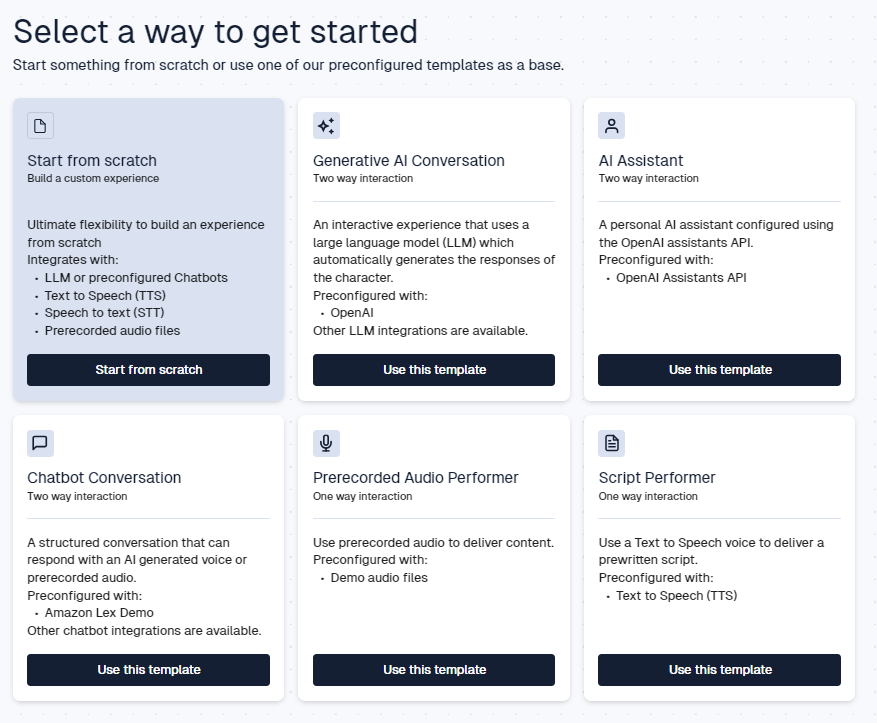
Starting from Scratch
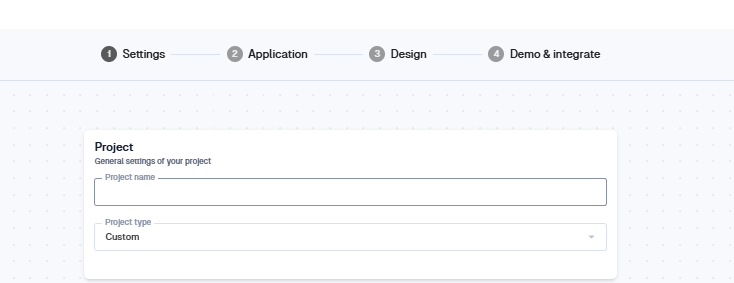
Project Name: Give your project a unique and memorable name. This field is mandatory.
Project Type: By default, the project type is set to "Custom" when you start from scratch. A dropdown menu allows you to explore other pre-defined template formats (explained later).
Let's Explore the Settings for a Custom Project
Here's a breakdown of the key settings available for a fully customised project:
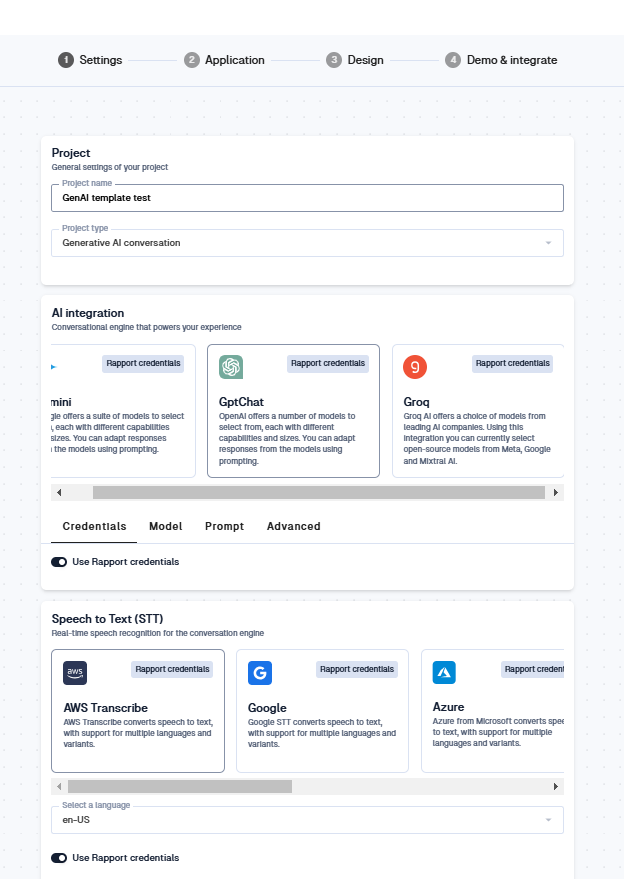
Project Name: This is a required field for identifying your project.
Project Type: This field determines the initial settings displayed and can be changed later if needed. It defaults to "Custom" when starting from scratch.
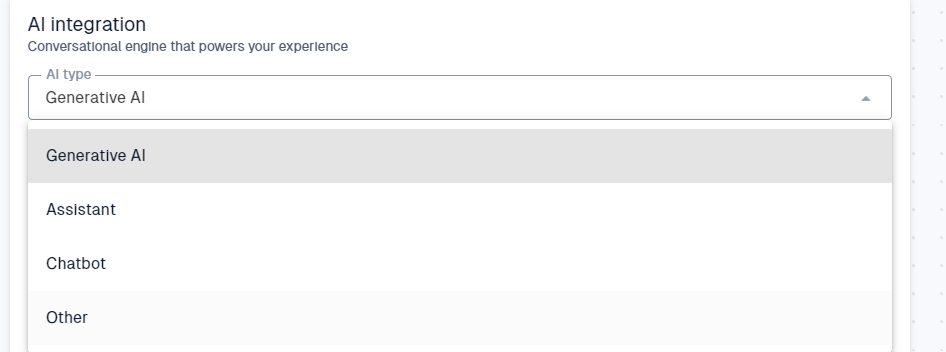
AI Integration
AI Type: This section allows you to choose the type of AI you want to integrate with your project. Rapport offers various integrations. "Other" allows access to Echo, Idle (Custom AI), and Voice Echo options. Each option has a brief description to guide your selection based on your project's needs.
Generative AI specifics
Rapport has integrations with a number of different Generative AI providers.
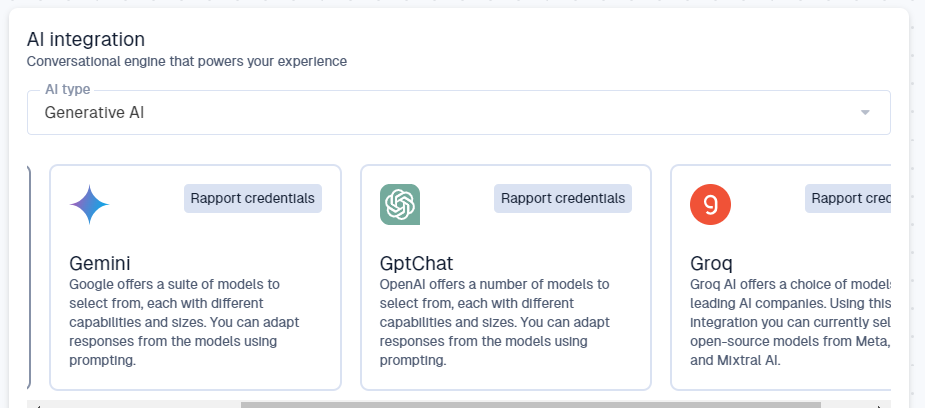
Upon selecting your preferred provider, fields associated with the AI type selected will be shown and are specific to the chosen AI type. Here we take Groq as an example:
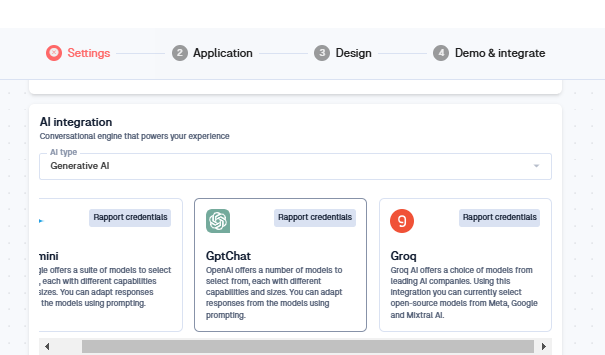
The following fields are dependent on the chosen AI Type:
Credentials: This toggle lets you choose between using Rapport's credentials or entering your own credentials to access an external AI service.
Model: A dropdown menu appears where you can select the specific AI model you want to use. The optimal choice depends on your project's goals. Please refer to the documentation for your chosen Generative AI provider for detailed information.
Personality: Craft a short prompt to influence the AI's behaviour and tailor its responses to your project's needs.
Advanced: These parameters allow you to fine-tune the generated text's diversity and quality. Again, please consult the documentation for your chosen Generative AI provider for detailed information.
For more information about using Generative AI for your dialogue, Have a read of our blog on LLMs
Assistant AI specifics (displayed if Assistant AI type is chosen)
Credentials:
Credentials: Similar to Generative AI, you can choose between Rapport credentials or enter your own for external services.
Assistant ID: This field is linked to a specific authorization key. If you want to use your own Assistant, toggle credentials off and enter the required information.
Chatbot Specifics (displayed if Chatbot AI type is chosen)
Credentials: This section functions similarly to the previous sections, allowing you to use Rapport credentials or your own for specific chatbot providers like Azure, Cleverbot, Dialogflow, Lex, or Pandorabots.bots.
Speech to Text (STT)
Enable/Disable: This setting allows you to activate or deactivate real-time speech recognition for your conversation engine.
Credentials: Rapport credentials are automatically enabled by default. You can switch this off and enter your own credentials if needed.

Text to Speech (TTS)
Enable/Disable: Control whether AI-generated voices read out the responses in your project.
Credentials: Similar to STT, Rapport credentials are automatically set by default. You can choose to use your own credentials.

Preset responses
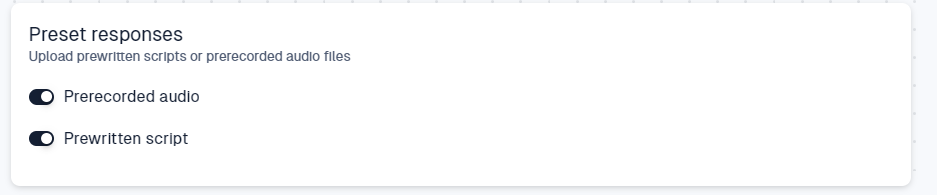
The "Preset Responses" section offers options for incorporating pre-recorded audio and pre-written scripts into your project. These options become visible on the Project Design screen only when you enable the corresponding toggle switches in the Settings.
Prerecorded Audio: If enabled, a dropdown menu appears on the Project Design screen, allowing you to select pre-recorded audio files to be used as responses within your experience.
Prewritten Scripts: Similarly, enabling this toggle switch displays a dropdown menu on the Project Design screen. This menu lets you choose pre-written scripts that can be used to generate responses during the interactive experience.
Using a Template
Selecting a predefined template like "Generative AI" will automatically adjust the settings page to show the minimum required fields. This simplifies the setup process for specific project types.
Don't Forget to Save
Your creations are like precious gems - you wouldn't want to lose them! Rapport won't automatically save your project, so be sure to click the "Save" button to lock in your masterpiece.
There might be a few mandatory fields to fill out depending on your chosen AI type (check the project settings for more info). But once you save, you can rest assured your work is safe and sound.