
Creating the session component
The Rapport Session Component can be created wherever you like, as long as you ensure that it is started before any Player Components are started, and stopped after all Player Components have been stopped. This is because Player Components require an active Session to function.
Once you have decided where to place your Session Component, it will need to be added. This can be done by selecting Add in the Components panel of the chosen blueprint.
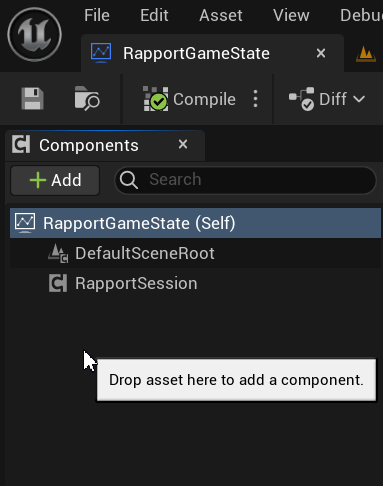
The Session Component will also have to be configured with the Rapport Project’s deploy token in order to connect. Details on how to to do this can be found here.
Starting the session
The Rapport Session is started by calling Start on the component. You must also pass this function a reference to the Rapport audio source that you wish to use for audio input. As for where the Start function should be called, one example would be in the BeginPlay event of a blueprint.
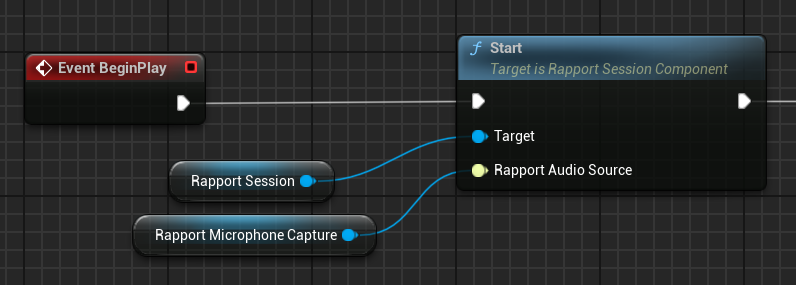
Once the Rapport Session component is started a connection to Rapport will be established, ready to send and receive data.
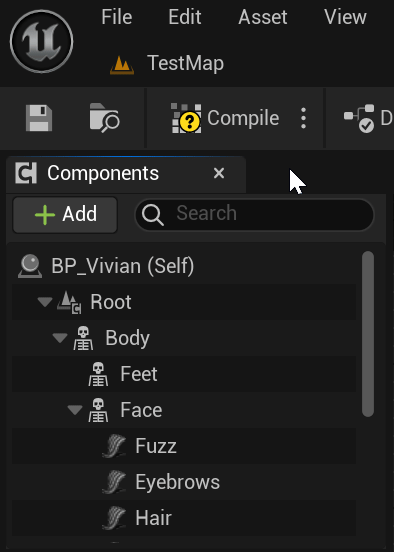
Creating the player component
The Rapport Player component should be created in the blueprint of the character which is to be driven by Rapport. This can be done in a similar manner to the Session Component, by selecting Add in the Components panel of the character blueprint.
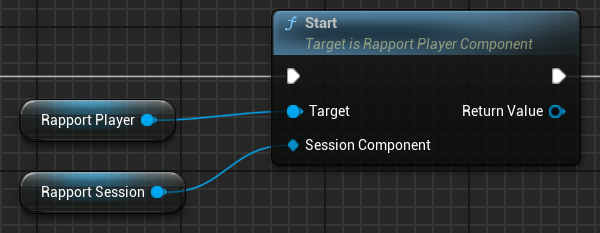
Starting the player
To start the Rapport Player, call Start on the component. You must pass this function a reference to the Rapport Session component so that the player can be linked to the session. The player will then begin receiving any incoming Rapport audio and animation data.
In this example, we call Start on the Player component immediately after we start the Session component. This is also a part of the character blueprint’s BeginPlay function.
Starting Audio Input
There are a few types of audio source available to use, including microphone capture, audio file input and a source that supports audio input via pixel streaming.
The approach to setting up audio input will differ depending depending on the type of Rapport Audio Source that you are using, however we will continue this example using a Rapport Microphone Capture source.
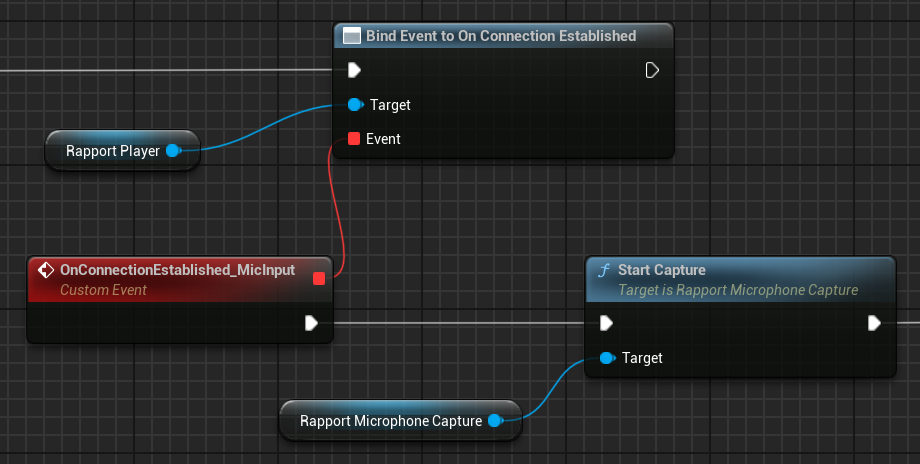
To start sending audio with a Rapport Microphone Capture component, simply call StartCapture. We recommend calling this after the OnConnectionEstablished event has been triggered.
Setting up animation
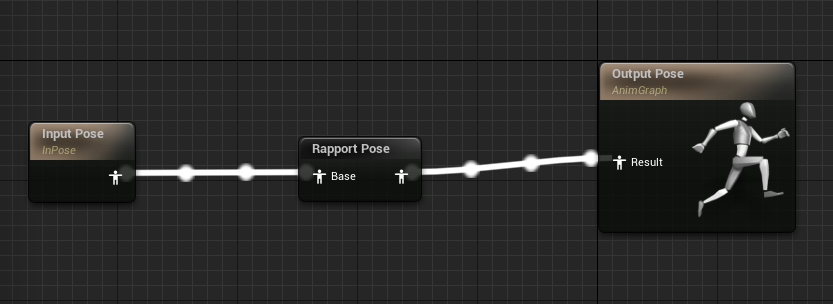
In order for the character to actually display the received animation, a Rapport Pose node must be used inside of an animation blueprint which is then assigned to the skeletal mesh that you wish to animate. The animation blueprint used in this example is very simple, however it is possible to use more complex blueprints that make use of techniques such as animation blending to combine Rapport animation with other sources of animation.
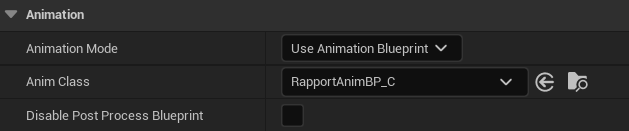
To assign the animation blueprint to the mesh, select the skeletal mesh component in the character blueprint, go to the details panel and find the Animation section. Here, set the Animation Mode to Use Animation Blueprint. Then, set the Anim Class to the animation blueprint which has the Rapport Pose node implemented.
NOTE: When using a MetaHuman character, we strongly recommend targeting the body mesh. See here for further details.
Stopping Audio input
Again, this depends on the type of Rapport audio source that you are using. For the Rapport Microphone Capture source, just call StopCapture when you would like to stop sending audio to Rapport.

Stopping the player
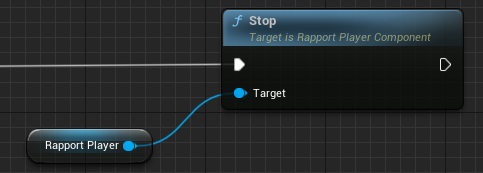
To stop the Rapport Player, just call Stop. Audio will no longer play and the character will stop animating. This does not end the connection to Rapport, but simply stops driving the character.
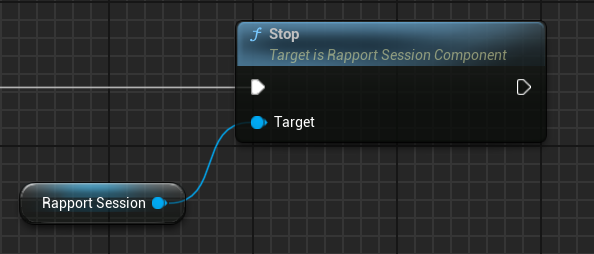
Stopping the session
To stop the Rapport Session, call Stop on the component. This should be done after the Rapport Player Component has been stopped.
NOTE: For this example, these functions to shut down the relevant Rapport objects are called as part of the character blueprint’s EndPlay event. Similarly to the BeginPlay event, EndPlay is available in any class that inherits from AActor. However unlike BeginPlay, the EndPlay event may not exist by default and will have to be added to the blueprint graph manually.